Setting up your RV Kitchen – Maximizing Space and Efficiency

Setting up your RV Kitchen – Maximizing Space and Efficiency

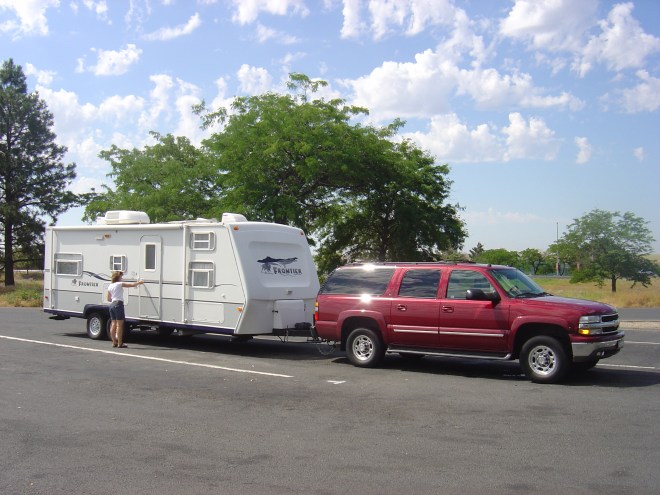
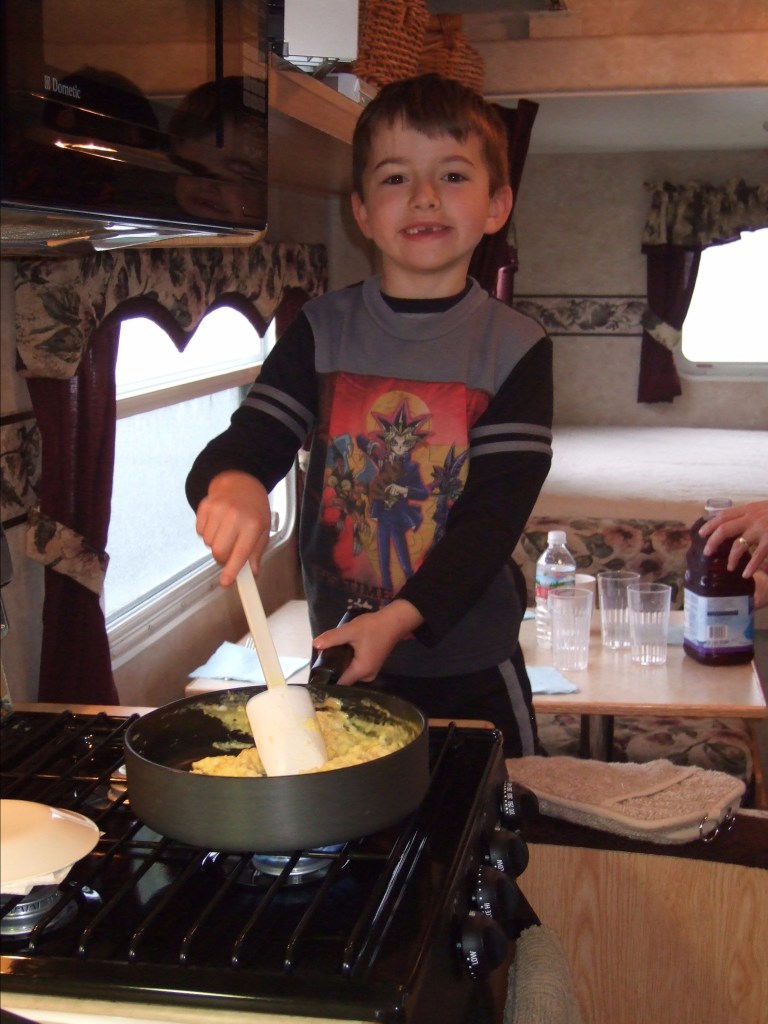
Eating together on vacation is fun! Sitting around the dinner table talking about the day’s adventures is a great way to connect as a family. In the feature picture for this blog post, are my parents who got us into RVing, my kids, and my husband getting ready to have a little brownie party in our first trailer (notice the awful upholstery that I wrote about in my last blog about decor.) Our first trailer had a galley type kitchen with very limited space, but we made it work.  Our second trailer had quite a bit more space for the kitchen, an island, a real pantry, etc.  Our new 5thwheel has a kitchen that has more space than my first apartment!  I’ve learned some things along the way that have helped us have an efficient kitchen and more fun cooking.  I’ve also learned, I can probably never go back after having actual counter space!

Two key things to keep in mind when you’re setting up your kitchen:

  1. You are on vacation!  This is your vacation home!  Don’t take all of your beat-up hand me downs out of your home kitchen and put them in your trailer.  Fill it with dishes you like (that won’t chip or break), quality cookware, and utensils that work for you.
  2. Keeping other people out of your way will make cooking in an RV kitchen lots more fun.  In our first trailer, the kitchen was a pass-through area between the door and the living/dining area.  We called that kitchen a one-butt kitchen in that only one butt could be in the kitchen at a time (unless, of course, the other butt was drying the dishes!).  So, we put the silverware drawer under the coat closet and the dishes in the drawer under the dinette.  That way, when it was time for anyone to help, they were out of my way while I was cooking.  Now, we have an island.  The silverware drawer is at the end of the island that’s furthest from the stove.  The dishes are in the cupboard at the end of the island.  This works for getting help setting the table and it also works beautifully for washing dishes and putting them away.  They go from one side of the sink dirty, to the other side dried and put away.  Think through your kitchen and how you’ll use it. Then, put things away in a way that works for you and your family.  If you’re already in your RV and are bumping into each other, fix it!
My son, Ben at the age of 5, in our first trailer standing on the dinette, helping cook. Notice my husband in the background working on setting the table – totally out of the way. (Ben is now 19 and serving in the US Marine Corps. He helps cook when he comes home!)

Other tips for kitchen set up:

  • Non-slip shelf liners are your best friends– This keeps your dishes and things from sliding all over the place while you’re on the road.  Line anything where you put things that you don’t want slipping around.   Here’s a link to it on Amazon:  https://www.amazon.com/Gorilla-Grip-Original-Non-Adhesive-Cabinets/dp/B07773PQG7/ref=sr_1_3?crid=1Y6QH5E4THPOT&keywords=no+slip+shelf+liners&qid=1561341434&s=gateway&sprefix=no+slip+shelf+%2Caps%2C198&sr=8-3
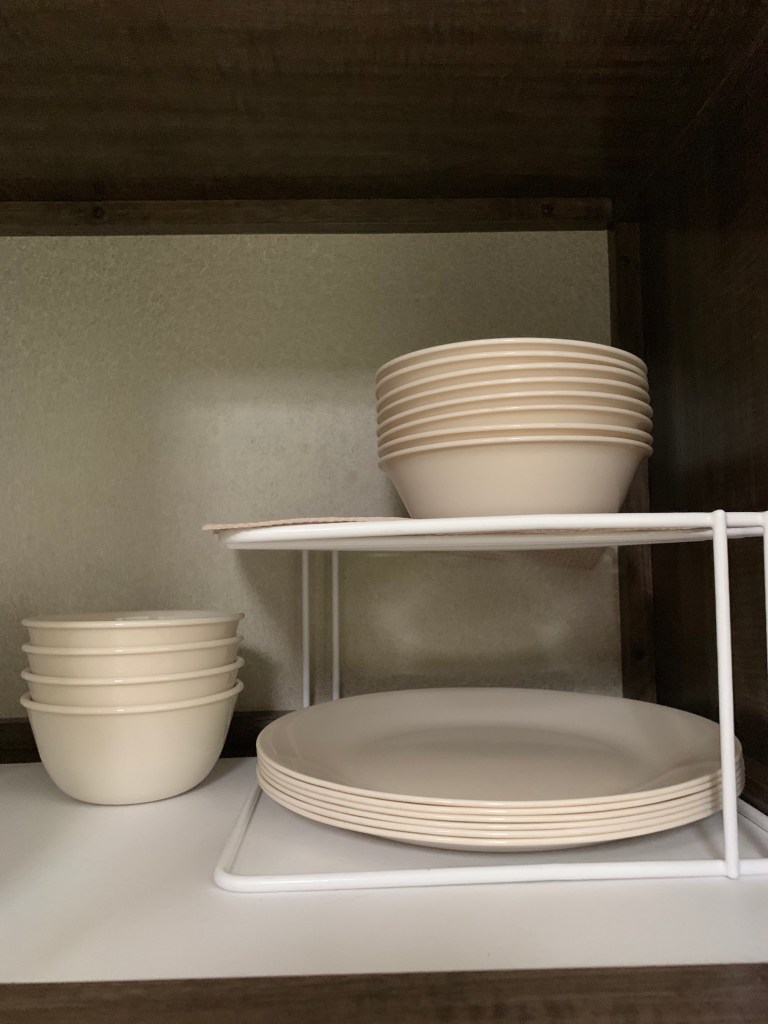
  • Corelle dishes – These are almost unbreakable.  When they do break, they explode!  We’ve had the same set for 15 years of RVing and have only lost two plates when we set up a cupboard poorly and the cupboard door popped open while we were on the road.  Luckily, it was a set of 8 place-settings, and we could never fit that many people in our rig anyway!  These dishes also stack very compactly.  They’re a great choice for RVing.  I like to add little free-standng shelves in my cupboards.  When I set the dishes up poorly that one time, I set the plates on the top shelf.  They’re too slippery for that!  Bowls that next are a better idea.  They don’t slide around.
My Corelle dishes minus two plates. Don’t put the plates on the top shelf! They turn into projectiles! Notice the no-slip liner under everything.
  • When it comes to the kitchen, think space-saving – Think things like nesting mixing bowls and measuring cups.  You can also find things like a collapsible colander to save space.  Try not to buy things that only serve one purpose unless you really can’t live without it.  For instance, I can’t live without my Pampered Chef avocado tool. So, I have one in my utensil drawer. Very important! 
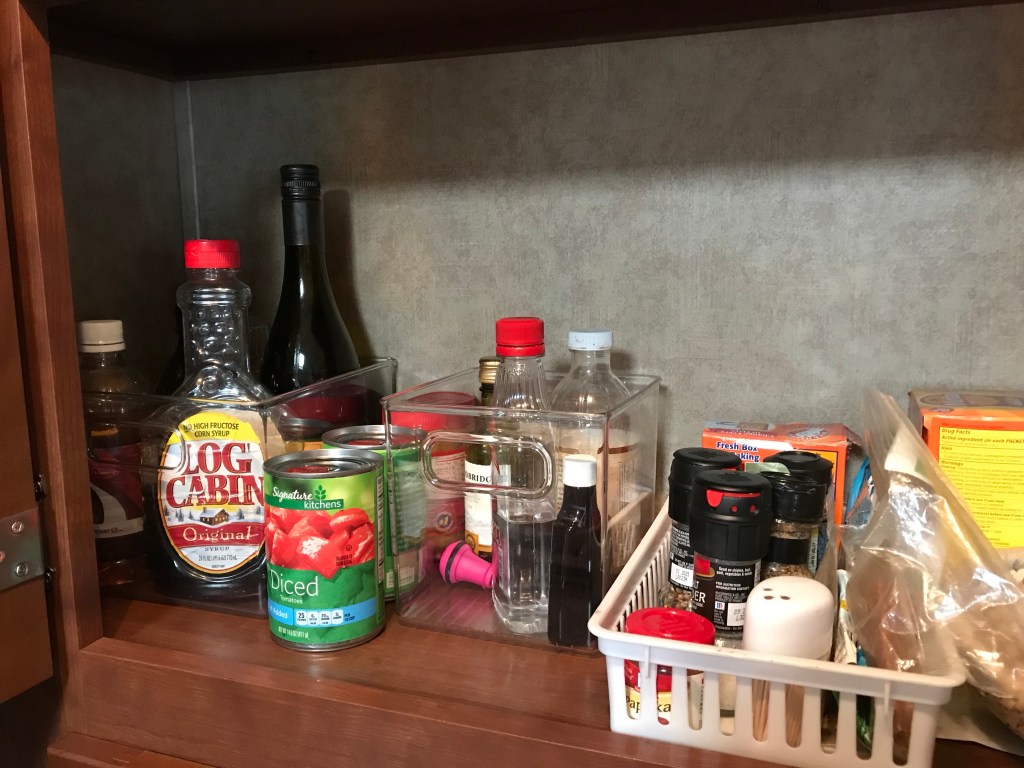
  • Find ways to avoid jumbled messes – I am in love with these clear plastic bins that you can put in drawers and in cupboards, refrigerators, and pantries. They not only keep things organized, but they keep taller things like bottles of olive oil or wine from toppling over.  They also keep little leaks out of your cupboards.  I have them all over my rig!   They are in the kitchen drawers, in the bedroom drawers, etc.  I love shopping for these at the Container Store because they have every size imaginable. Amazon also has a bunch.  I have also seen them at Home Goods, Bed Bath and Beyond, and a few other places.   Here’s an Amazon link some for the pantry https://www.amazon.com/interDesign-Kitchen-Organizer-Refrigerator-Freezer/dp/B00CS8DT00/ref=sr_1_5?keywords=pantry+binz&qid=1561341129&s=gateway&sr=8-5
I love pantry bins! The clear ones are my favorites!
  • Sort your kitchen utensils by size and then, category – If your kitchen utensils are in a drawer, sort them by size.  They stay less jumbled that way.  I sort by size first and then, by category.  Use the little sorting bins mentioned above.   For instance, I have my knives on the long side of the drawer where aren’t any little bins.   Little utensils for working on vegetables like my avocado tool and tomato corer are in the same bin.  If You’ll have a much easier time finding things and spend less time digging through your drawer.  You’re on vacation!  Looking for things isn’t fun!
  • Utensil holders – If you have room on your counter, a utensil holder is great. I have one and put it in the cupboard when we travel so it doesn’t slide.  In our last trailer, I was able to wedge it between the coffee maker and the wood valance thing and it didn’t move.  I love to cook.  Having my most used utensils handy is important to me! 
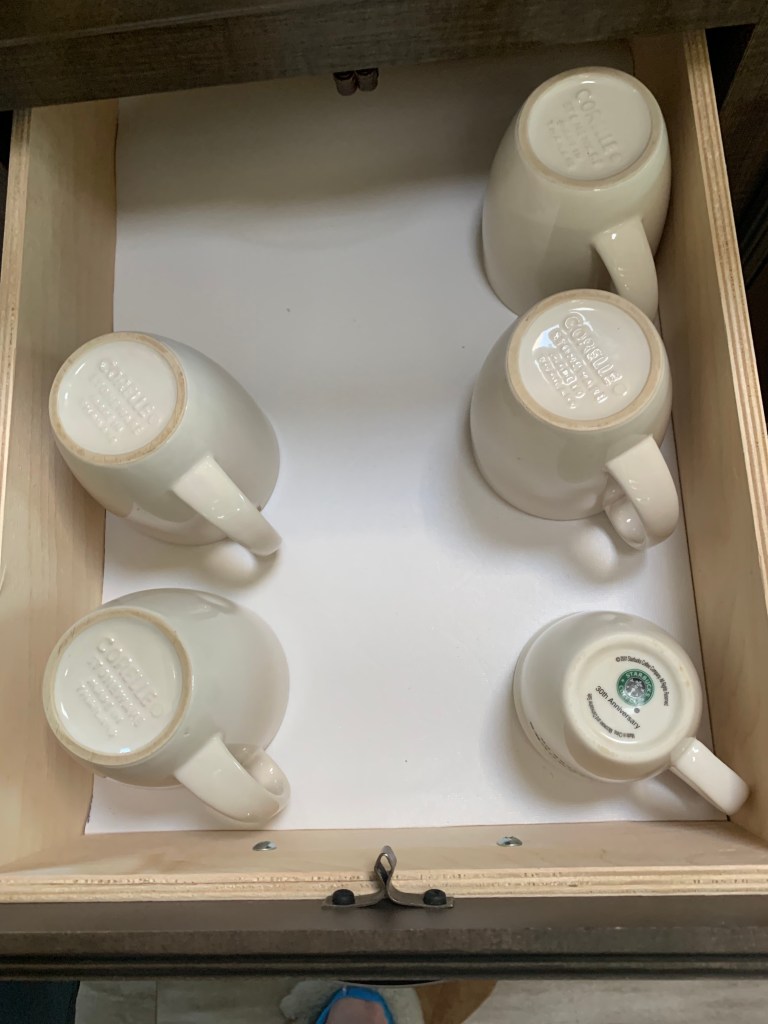
  • I love a mug drawer!  – We had our first trailer for 10 years and kept our mugs in a drawer lined with no-slip liner.  We never had a single chip.  We got a new rig and put them in the cupboard and got all kinds of chips!  I have designated a mug drawer in our new 5thwheel.  I’m pretty excited about it!
I love my mug drawer!
  • Get good non-stick cookware– You can buy decent non-stick cookware and the prices are all over the map!  Check out places like Home Goods, TJ Max, and even Target for nicer pots and pans. Remember, you won’t have a garbage disposal and probably won’t have a dishwasher.  The last thing you want to do on a vacation is to work hard at  scraping things out of your pots and pans into the trash and then, scrubbing them.  No fun!
  • Measure your oven! – RV ovens are weird and aren’t universal in size.  Each of our trailers have had a different sized oven. I once bought a cookie sheet for the trailer without measuring.  It would have fit had it not had little handles. My husband bent it up to make it fit. This time, I measured!  I have a really nice, new cookie sheet that’s going to actually fit!  If you’re using something like a Dutch Oven, you’ll want to measure the height to make sure it’s going to fit.  (See my blog entitled, “Don’t burn your biscuits – Dealing With Weird RV Ovens” for tips on getting your oven set up to cook better).
  • Under the dinette storage – If you have a booth dinette, you most likely have extra storage.  That’s where I put things that I don’t use as often – like my beat-up pot that I cook clams in.  If you have a drawer in your dinette bench – lucky you!  That’s where we put our dishes in our first trailer.   In all of our trailers, we have also store beach towels in the dinette.  Funny thing, we live in the Pacific Northwest and do most of our trailer trips to places without warm beaches.  When I moved the beach towels into our new rig, we still had Little Mermaid and Power Rangers towels.  My kids are now 23 and 19.  It’s been a while since they were used!
  • If you have a shallow, wide drawer – this is a great place to put things like cookie sheets, cutting boards, a flat cheese grater, etc.  
  • Counter space maximization – Many RVs are short on counter space.  If yours didn’t come with the extra pieces of counter that you put over the sink, I recommend having some cut.  Have two cut – each ½ of your sink’s size.    This way you can have half or all of your sink covered.  This will add some space onto your counter.  Your stove probably has a cover.  We use the cover on the stove for extra counter space when needed for things like pizza boxes (because sometimes, ordering pizza is a life-saver!)
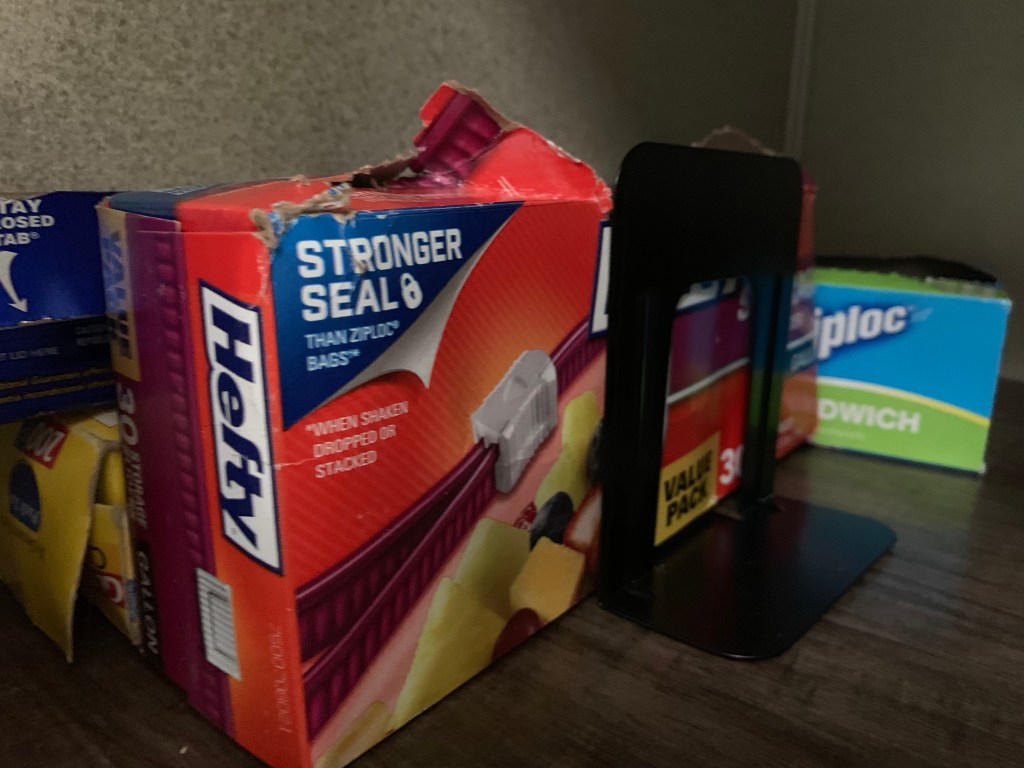
  • Non-slip bookends– I have recently discovered a new use for non-slip bookends. These are very inexpensive and a great way to keep things like boxes of foil and Ziploc bags from sliding around in the cupboard.  I’m also planning to use them to hold up boxed food like cereal.  They come in a package of two for about $4.
Bookends keep things like ziplock bags, foil and saran wrap from flopping over while you travel.

If you’re still shopping for your RV, make sure you don’t get wooed by the rest of it and settle for a kitchen that you have to make work for you.  When we were shopping, I’d check out the kitchen first.  If I didn’t like the kitchen, I didn’t bother to look at the rest of the rig.  The kitchen is that important to me.  My husband went along with this crazy method because he likes it when I like to cook while we’re camping (fake camping). 

I hope you’ve found at least a little take-away that you can use in your trailer or maybe your kitchen at home.  Happy kitchen set up!

Next Trailer Girl Blog Post – Setting up your Bedroom and Bathroom 

Setting Up Your Trailer – Making It Yours While Maximizing Comfort and Space

Decor

You buy an RV because you want to be comfortable when you camp, or as we like to call it, fake-camp. You’ve probably spent your fair share of time in a tent sleeping in a sleeping bag.  That’s all fun, but you’re ready to be comfortable!   You’re also on vacation.  You don’t want to spend a bunch of time after you arrived setting up and straightening up.  

We recently purchased a new fifth wheel.  I have been having a lot of fun getting to make it ours and organizing cupboards and drawers.  This is now the third rig I’ve set up and personalized.  I have gotten way too many ideas of what to put into this blog post. So, I’ve decided to break it down into 4 posts: Décor, Kitchen, Bedroom and Bath, and Favorite Things for Storage.

Let’s start with décor since many of you may already have everything set up efficiently enough for you. We purchased our first trailer in 2004. RVing was nowhere near as popular as it is now, and décor was stuck in the early ‘90s.  Trailers came in dusty blue or mauve.  Bleh!  Our sofa had mauve and burgundy flowers with green leaves.  I hated it, but there was no good reason to pay big bucks to re-cover it. So, I had to work with it.  I did everything I could to pull out the burgundy parts of the flowers and the green on the leaves.  I used green and burgundy throw pillows and then, tried really hard not to look at the pink flowers for the 10 years we traveled in that trailer. Thankfully, the RV industry has gone more neutral in their design and it’s much easier to add décor touches that are actually yours – not the mauve version of you!

 I’ve recently joined the Facebook group for our trailer manufacturer and have seen some over the top re-decorating including re-wallpapering, re-upholstery, painting, etc.  I like to save that effort for my house and work with what I’ve been given in the trailer (since I had so much practice with the mauve and number).  Keeping it simple will also save you money so you have more to spend on actually going places.

There are a few things to keep in mind when you’re decorating:

  • You’re preparing for an earthquake – OK so not a real earthquake, but when you hit the road, whatever you’re towing has an earthquake every time you hit the road. Don’t put anything in your RV that you are worried about getting broken.  
  • Décor can add a chore to your set up if you let it – I try to avoid too much nick-knack type items that have to be taken out to set up when we arrive and put away when we get ready to go.  I’m on vacation already!  I don’t want extra chores!  I save this chore for very special items, like a favorite photo of my kids.
  • You should love it – This is your vacation home!  Only decorate with things you love.  I love being in my trailer!  It’s been a thing for all three of them!  I love looking around at my “vacation home” and enjoying my surroundings. Of course, it helped to be sitting on the ugly mauve sofa so I couldn’t see it when we were in our first rig.  If you can’t sit with your morning coffee and enjoy your surroundings, fix it!  Find something you love and put it in your RV! For the record, in the featured photo of our sofa. My husband loves the “dead animal” pillow and I love the Pottery Barn pillow. I love the “dead animal pillow’s” colors and how it represents so much of our travels around the Western US. They’re sort of pulled together by the red leather pillows. We decided we didn’t care if it wouldn’t be approved by Martha Stewart. We love it – even if it might be breaking some interior design rules!

The biggest bang for your buck in décor are things like throw pillows, rugs, towels in a color you like, or a throw blanket on your bed or over the back of your couch.  All of these things can be easily changed out if you get tired of them too. My mom was a super decorator.  She would put new curtains in everything she touched, including my first trailer!   It was a good thing!  The first set of curtains faded quickly.  She made some really nice ones with linings.  Now, I’m seeing less curtains and more shades in trailers.  There are often curtain type valances that are easily replaced with a little sewing know how.  Don’t let curtains or fabric valances be deal-breakers when choosing your trailer.

In our new rig, we used mostly things we loved from the décor we put in our old trailer such as throw pillows, the quilt on the bed, pictures from the walls, etc.  We are National Parks geeks and we’ve been collecting greeting card versions of the posters.  I frame them and we hang them on the walls.  It’s a cheap way to decorate!  It’s also fun to decorate with souvenirs from our travels.

Hanging things on the walls is a bit of a conundrum.  Trailer walls aren’t like the walls at home.  For wood frames, we drill all the way through the frame and screw it onto the wall with 4 attractive screws.  We’ve never had a problem with a picture coming off the wall.  The rub is, when you go to sell your rig, you either have to leave the pictures or holes in the wall.  What we did was, took the frames down, pulled the pictures out, and screwed the frames back up.  So, the new owners of our trailer will have frames to fill with their favorite pictures.

4 attractive screws are holding up my picture. This is a framed greeting card version of a National Parks poster that I framed myself.

For our new trailer, I bought a metal sign that I absolutely love.  It didn’t have a good way to hang it from a screw without compromising the design.  I used command picture hanging tape and it’s working great.  I’d be leery of using it with picture frames with glass.  Trailers get exposed to such big temperature extremes. I just don’t trust the tape for something breakable.  I’ve heard from others that they’ve had no problems.  

I thought the screw might compromised the great design. So, I hung it up with Command Picture Hanging Tape. Ghostly looking person in the window is me!

Kids and general activity can cause a disturbance in the décor.  There are wallets, cell phones, cell phone chargers, sunglasses, brochures for things to do, the pamphlet that the RV park gives you with all the rules, the paper with the code to the “big potty,” etc.  All of that can clutter things up and drive you nuts (or not – I am a bit of an OCD neat-freak so these things drive me nuts).  Here’s how we keep it under control.

  • Baskets are a big help– Our first trailer had open shelving.  I didn’t want to see everything on the shelves.  So, we put things in baskets.  It looked great and our stuff stayed put.   We also have a little basket for the keys and wallet so we can always find them.  In our new trailer, I found a spot for a flat-ish basket.  Our plan is to keep all of our brochures and RV park papers in it. 
  • Magazine Rack – A magazine rack that can be attached to a wall is a great way to corral all of the miscellaneous paperwork, magazines, maps, and such that come with your travel.  Just remember to clean it out every so often.  When we were moving out of our trailer, I found things that were 5 years old. We probably didn’t need to save them.
  • Cute recycle basket – We had an issue where we had empty water bottles floating all over the trailer.  We would also pile recycling into the corner of the counter and it looked awful and was also in the way.  So, I bought a cute, small, narrow basket that fits by the door of the trailer.  It fills up at least once a day, and we empty it (or when we had a kid along, we’d send him to the recycling.  We kind of miss his recycling services.)  It really helps to keep the recycling clutter down.
  • Trash can with a lid – One of the best splurge-ish things we ever bought for the trailer was a butterfly lid Simple Human trash can.  We mostly bought it because at the time, we had a dog that liked to get into the trash and it was Daisy-proof!  The beautiful thing about this trash can is, you can’t see the trash, it’s nice looking (as trash cans go), and it’s easily accessible for us to use. We also spend the extra money on the Simple Human trash bags because you also can’t see them!  We really love our trash can! Weird, but true!

If you’re refurbishing a vintage trailer, or fixing up an older used trailer, you’ve got a much bigger project and might need to do things like sew new curtains, re-upholster, re-wallpaper, etc.  That could be a fun project!   I love this show called “Flipping RV’s.”  Check it out!  They refurbish old, sad trailers and do some great décor.    You might find some inspiration.  Even if you’re not into vintage trailers, it’s a fun show to watch.

If you’re still shopping for your trailer, when you step inside a rig you like, sit somewhere in it.  Imagine yourself with your morning cup of coffee and decide it it’s worthy of becoming your vacation home.  Think of what you might be putting into it that you love.  Will it get along with the décor the rig comes with?  Remember, it’s your vacation home!  You don’t want to feel like you’re renting someone else’s vacation home.

Whatever you’re doing, I hope you love it and that it makes your trailer into your vacation home! Happy setting up!

Next Trailer Girl Blog Post:  Setting up your RV Kitchen – Maximizing Space and Efficiency

When The Last Nerve Rears It’s Ugly Head – Getting Back to the Happy Camper Mindset

This post is inspired by Victoria, who after reading my last post about backing the trailer and staying married suggested I follow up with how to get back to the Happy Camper frame of mind when communication goes south.  Thanks for the inspiration!

Let’s face it.  You’re spending hours on end in a car or truck hauling a big box of some kind behind you.  Then, you have to set up said box.  Once the box is set up, you’re climbing into it with the same person or people you’ve been on the road with all day.   It’s not going to always be happy camping bliss.  It is inevitable, you’ll get on each other’s very … last … nerve. The trick is to not let it ruin your trip.  Here are tips I’ve learned from almost 28 years of marriage, 23 and a half years of raising kids, always a having a dog or two, and 15 years of RVing.  If you’re into math and look at those numbers, the laws of probability will tell you, there’s a pretty good chance that things have gone sideways a time or two.

First the easy one– When the dogs are on your last nerve.   Usually, when our dogs are driving us nuts, they need to have a walk.  Their annoying behavior is usually cured with a walk, potty break, or some food.  A tired dog is a good dog.

Now for the trickier things.

The kids– Our kids, now 23 and 19, went through all sorts of annoying phases along with times of being super travelers.  We used to say they were either adorable or horrible and that there wasn’t really an in-between.  Here are some things we found helpful:

  • Prevention– It’s probably some kind of bad parenting to not make your kids look out the window when you’re driving all over the country.  We sold out! We bought a tow rig with a DVD player that they could also hook up a video game console to.  It was a Godsend!   There was one trip where we were traveling down I-5 toward Sacramento from the Seattle Area.  It was the morning of our second day.  We had seen about 752 farms and about 5 million cows (writer’s embellishment – maybe).  My daughter looks away from the video screen and out the window and says, “Hey look!  Cows!” like that was the first she’d seen of them.  We felt like bad parents, but also sane parents, which, in the end, prevents further horribleparenting!  
  • Leg stretching – Don’t only stop for gas! Sometimes stopping someplace more interesting like, dare I say, Walmart, where they might pick out a new movie for $5 can help.  We liked stopping every now and then at those giant strip malls that have a Starbucks, Target, Barnes and Noble, Old Navy, etc.  You can pick up all kinds of things that were maybe left out of your packing, get a snack, and distract everyone from the road for a bit.
  • RV Park Scavenger Hunts– When you need to have a little peace and quiet in the trailer, send the kids out (if they’re not too little!) on a scavenger hunt.  Our favorite scavenger hunt was license plates.  We would give the kids a walkie-talkie and keep the other with us. Then, we’d send them out with a clipboard, paper, and a pen and have them write down all of the different states they found.  We’d check on them on the walkie-talkie and get a report.  NOTE:  We only would do this in RV Parks we felt were really safe!  
  • Take an hour to take out the trash – It was toward the end of a trip.  The kids were on my last nerve.  I just needed a break from everything.  So, I volunteered to take the trash to the dumpster.  I was gone an hour!  I wandered all over the RV park, looked at all the different rigs, looked at the plants, looked at the pool, etc.  I felt much better when I returned to my trailer having stepped away for a bit.
  • Lock the kids in the trailer and go for a walk – Once again, we’d employ our walkie-talkie system and lock the kids into the trailer and go for a 30-minute walk around the RV Park by ourselves.  It gave us a chance to talk without interruption and a nice break.  NOTE: Again, we only did this in RV Parks where we felt it was safe to leave the kids alone.  
  • If the kids are old enough, go out to dinner without them on a date – Once our daughter was old enough to babysit, we would occasionally leave the kids at the trailer and go to dinner alone.  We would only do this in RV parks that were very familiar to us and that we felt were very safe.  
  • Remember the 8 O’Clock Rule – We all would get along better when we have been well fed.  See my previous blog for information about the 8 O’Clock Rule.
  • What my parents did – One summer in the 1980’s, we drove from Long Beach, CA to Michigan.  My brothers and I were piled into the back seat of an Oldsmobile.  We were motel-ing it in AAA 2 diamond or less motels.  I had to sit in the middle on the hump, which, in theory, was supposed to keep my brothers from fighting.  It didn’t work.  My parents decided they’d pay us each a penny a mile to be good.  My mom had a little demerit log and if we were bad, we’d lose a penny  or several depending on the crime.  If we never lost a penny, it added up to about $30 each which we got to use for spending money on the trip.   This plan backfired when my brothers pooled their money to buy a noisy electronic baseball game that they played in the car. It drove everyone who wasn’t playing the game at the moment nuts!  One genius part of this plan was when they would put us on “talking restriction” when were bickering.  They would say, “No talking for the next 10 miles!”  Inevitably, the bickering would stop.  Shortly after that, the snickering would start.  We thought we were getting away with something.  After traveling with kids for all these years, I’m now certain our snickering was part of their end game.
  • If someone has a favorite, try to work it in – If there’s someplace that is a favorite, go!  For instance, my son (and my husband) love In N’ Out Burger.  If we can work that into a lunch stop, there’s a lot of contentment after lunch!
  • Find the humor in their annoying behavior – My all-time favorite tattle from my daughter, “Mom!  Ben called me a knuckle scratcher!!!”  NO one in our family knows what a knuckle scratcher is to this day! My son made it up in the heat of the moment.  It still makes us laugh!  Kids are hilarious!  Find the humor!

When you and your spouse are on each other’s nerves – This is the hardest one to recover from.  One of the things we have going for us is, we actually really LIKE each other and enjoy spending time together.  It really helps!   Here are some things we’ve learned that help us on any day, but especially when we travel.

  • Doing everything together is not romantic – It took us 9 years of marriage to figure out that doing things that the other isn’t interested in alone or with another friend is OK.  It now seems obvious, but we were a little slow on the uptake.  For instance, my husband hates shopping.  I love browsing in little boutiques and shops when we’re on a trip.  He loves golf.  I can’t hit the ball to save my life!  So, he’ll drop me off in town for my browsing and he’ll go hit some golf balls or play 9 holes.  Then, we meet up for the things that we actually like to do together.  In our favorite “default” RV get away, I can walk to town from the RV park.  We meet up for lunch and then, walk around in the art galleries together saying things like, “I could make that!” or “I might buy that if I had $10,000!”  It’s fun!
  • Meet Friends– We have friends who we camp with, friends who stay in nearby hotels where we camp, and friends who will drop by for a day in some places we camp.  It’s fun to have extra people and gives us a little break from each other, or at least a buffer.
  • Remember the 8 O’Clock Rule– (see previous blog post).  We sometimes have to just not talk until we’ve eaten!  
  • Don’t hash it out in the heat of the moment – Sometimes communication goes sideways.   When this happens, we often need a cooling off period before we can talk about what went wrong.   Sometimes it’s a few minutes.  Other times, it’s after we’ve had a meal (because often the poor communication happens when we’re hungry).  Sometimes it takes a night’s sleep, breakfast, and a cup of coffee before we can straighten things out. I have found that doing a verbal autopsy of the whole situation only makes my husband feel blamed and puts him on the defense.  Whenever we have our heads screwed on straight and can actually think out what we say first it’s better to say, “Well, that went badly. What can we do next time to keep that from happening again?”   Of course, on trips, it’s often been the whole backing the trailer and set up process that got us annoyed with each other. And, it’s often been the case where we were speaking two different backing languages.   It’s helpful when he can say, “I need you to say ____ when ______.”
  • Only one of us can lose our cool at any given time – Somewhere in our relationship, we came up with an agreement that has worked well for us.  That is, only one of us is allowed to lose our cool at a time.  The other needs to either be quiet, say, “anything I can do to help?” (and not lose coolness when the answer is a gruff “NO!”), or just walk away for a bit.  For instance, this could happen to us after we’ve arrived somewhere and he’s trying to get the trailer leveled and then set up the hoses.  When I hear sputterings, that’s my cue that it’s my turn to be level headed.  He does the same for me when I have a cooking tizzy or something.  I have my fair share!
  • Choose your battles– Now that I’m in my fifties, I wonder why I ever got so perturbed by so many things.  In my younger days, I let so many little things bother me!  What a waste of energy!   If, when things are going badly, you can think about the bigger picture of the trip, it’ll make that little thing you’re all worked up about seem less significant and not worth your energy.
  • Say “I’m sorry” and move on to something more fun – It seems obvious, but it’s sometimes much easier said than done.  
  • Communicate your expectations – Some of our biggest rifts have come from not saying what our expectations were for a situation or a day and then expecting the other person to fall in line with this un-communicated expectation.  For instance, I might expect that the day after we’ve arrived late at night, that we’re going for a big hike.  I’ll set an alarm and try to get everyone rousted and ready to hit the trail.  His expectation might have been to sleep in, have a leisurely breakfast, and then, plan the day over a cup of coffee.  This could lead to me annoying him and me being disappointed.  Had we just taken the 2 minutes the night before to say, “What do you want tomorrow to look like?”, we could have saved ourselves some frustration.
  • Let your gifts shine! – Everyone has a gift that they can use on an RV trip.  Mine is planning and organizing.  Before we go on a big trip, I have a folder full of reservations.  I’ve googled what to do in the area.  I might have reservations for activities, etc.  My husband teases me about being “Julie the Cruise Director,” but also says that he appreciates the planning.  My husband is a really good logical thinker-problem solver type.  So, when something goes amuck or if there’s something to be figured out logically, we defer to him.  I tend to think up too many different ways to solve it and make it much more complicated than it needs to be.  
  • Get the Navigation Package! – I am horrible with directions!  I always have been and I don’t see things getting any better as I get older.  My navigating while he’s driving and pulling a trailer isn’t always a good thing – even when I’m using the GPS on my phone! When it came time to replace our 14 year-old Suburban with his truck, we got the Navigation package.  Now, he gets annoyed at the Navigation system instead of me. It’s a beautiful thing! 
  • If your marriage is trouble, an RV probably won’t save it – I’m not a professional counselor, but I’d say don’t buy an RV to save your marriage!  Go to counseling and then get the rig!  Or, do it simultaneously.  Our trailer has been a blessing to our relationship and given us some really fun times and special time together.  We had done a little time in the counselor’s office prior to buying our first trailer. The tools we got from counseling came in really handy on our trips and made the whole experience better.
  • Keep a sense of humor – I’d say that keeping a sense of humor has been one of the most important ways we’ve been able to get ourselves back on track.  Most of the time, our annoying situation is funny after some time has passed.  

No annoyance is worth ruining your trip over.  When you’re in close quarters with people for long periods of time, there is bound to be some strife.  Don’t ever let it ruin your trip!  Find a way to get over it, around it, or through it!  Then, just have fun and enjoy each other’s company!  You’re on vacation dang it! 

This post was inspired by a comment!  If you have something you’d like to read about, please leave a comment.  If I have an experience that is blog worthy, I’ll write about it!

Next Trailer Girl Blog Post – 40 Acres and Why You Need It

Parking the Trailer and Staying Married

If you’re looking for sage marital advice, you’ve chosen the wrong blog.  This is literally meant to be a post about how to park a trailer or RV with another person and being OK with being inside of the rig together once it’s parked.  Parking the rig can be the most stressful part of the whole trip.  If you don’t have a trailer, maybe it’ll be of some help, but it’ll probably just be a little amusing.  

We bought our first trailer in 2004.  That’s when cell phone service was nickel and diming everyone by the minute and service was spotty.  It’s important to keep that in mind when you’re reading this as you’ll wonder why in the heck we didn’t use modern conveniences.  We did! They just weren’t 2019 modern.  When we first got our trailer, we realized that we’d have to leave after work and that we’d get to our campsites late and we wanted to be quiet about it.  So, instead of rolling down the window and having me yell which way to turn, we decided to get walkie talkies and some flashlights that had a glow stick feature on the end. That way, I could talk to my husband while he backed the trailer and point to where he needed to go with the glow stick – flashlight.  This would help us do this task more quietly.  It turns out that was pretty genius.  What we discovered by not yelling was, it kept the tension down.  I won’t lie and say it was a blissful perfect backing situation.  It kept the tension to a minimum.  Yelling tends to cause a rise in tension.  Anyone who has kids already knows this.

Another thing we had to learn was to speak the same trailer backing language.  That took years to master!  I think after 15 years at it, he understands me even though I’m not using the language he would choose.  I say things like, “The butt of the trailer needs to go more toward the driver’s side.” I also say, “Looks good enough for government work!”  and “It’ll be fine!”  That’s not something you should say when the person backing the trailer is an engineer and wants everything lined up straight and perfect!

Here are two trailer backing stories for you – the best experience, and the funniest.  Neither of these experiences involve me on backing communications. I was on Kid-Patrol.  

First,  the best experience.  After a super long day on the road between Redding, CA and San Diego, CA (I think this is the trip where we invented the 8:00 rule), we arrived at our campground exhausted.  If I drove at all, it was probably for no more than an hour.  He was seriously tired of driving and hungry.  San Diego camp grounds are kind of party places.  It’s warm at night and people sit outside of their rigs enjoying the evening. Thank goodness our next-door neighbors were doing just that. The neighbor got out of his seat, walked up to my husband’s window which was rolled down and offered to back him in.  Our camping neighbor got him in one attempt.  No jockeying back and forth.  No pulling out and starting over.  One perfect trip into the spot.  It turns out, our neighbor was a long-haul trucker and was the perfect backing coach! My husband will tell you that to this day, that was the best trailer backing experience he’s ever had.  

Now, the funniest experience. We arrived at a state park campground where we were meeting some friends.  They were, of course, much more organized than we were and got there a couple hours before us and were all set up.  When we arrived, it was dark, the kids needed to stretch their legs, and the dogs needed to be walked.  Not to mention, it was after a full day of work and however long it took us to pack up and go.  Our friend, Mike, offered to back my husband in so I could be on Kid-Patrol.  My husband told me to let him do it because “guys speak the same trailer backing language.”  Our friend, Mike, is an FBI (Full Blooded Italian) from Queens, NY, so he’s really good at yelling, speaking with enthusiasm, and hand gestures. He’s very entertaining!  He didn’t use the walkie talkie.  It wasn’t necessary.  He got my husband all backed in and after putting down the jacks, pulling out the rear slide, and hooking up the electricity so I could start dinner, my husband started hooking everything eles up.  When it came time to put the sewer hose in the receptacle in the ground, he couldn’t find it.  It turns out, Mike had him parked with the wheels right on top of the sewer receptacle! Of course, that was discovered after I had set up the inside, started dinner, and the jacks were down.  It was decided that we would move the trailer in the morning.  Mike left a note on a post-it about “Mike’s trailer moving service” that we have in our trailer to this day (we moved it into the new trailer).  We’re getting worried about it and I’m thinking I’ll frame it.  It’s such a funny memory!

Here are some things that we learned in our backing communication that I hope can be a help to you:

  1. Before we even begin backing, he gets out of the car and walks around the area where we’ll park. He checks out where the sewer hook-up is, where the electrical is, low hanging branches, etc.
  2. Once he’s surveyed the situation, I get briefed.  He’ll tell me, “We need to line up pretty much perfectly so the sewer line is in line with the sewer hook-up spot.”  Or “You need to be looking out for that branch so I don’t hit it.”
  3. Back in the day, we would use walkie talkies.  Now, I call him on my cell and he has a hands free blue-tooth hook up in his truck.  It works so much better than walkie talkies.  I then, talk him back into the spot using my un-couth trailer backing language.
  4. Once we think it’s close, he gets out and checks everything out to make sure it’s going to work, that the slides will come out without running into anything, etc.
  5. Before un-hitching, walk all the way around the trailer and make sure everything is going to work.  Don’t just look at the hook-up side. 

By now, you might be wondering about the feature photo for this blog.  That was our last camping trip.  Yep, after 15 years, we’re still screwing up!  We had driven in traffic and it took us longer than expected to get to our campsite. We were considering invoking the 8:00 Rule, but there were no restaurants around the camp ground and we packed food to make for dinner.  We could make it.   We did a great job backing the trailer, lining up the sewer stuff, making sure we could get the slides out, etc.  One thing we forgot – walk all the way around the trailer.  As it turns out, the other side of the trailer hung over a little hill that sloped steeply down.  The jack couldn’t reach the ground!  My engineer husband Macgyvered that set up.  As it turns out, it was surprisingly stable and held for the entire weekend.

Here’s the best piece of advice for staying married, friends, whatever while backing a trailer – have a sense of humor.  Don’t let the stress of getting parked ruin a trip.  Also … it wouldn’t hurt if you’re buying a new rig and a backup camera is an option to get one.  We don’t have one and we’re still at it after 15 years. There are T-Shirts for this that say, “I’m sorry for what I said when I was parking the camper.” That’s because it’s a challenge that needs to be met with humor.

I hope that’s helped. If it didn’t help, I hope it at least entertained you a bit.  I’d love to know what you’d like to read about.  If you have something you’d like to hear someone else’s experience about, I’d love if you’d leave a comment.  If I have an experience with your topic that is blog worthy, I’ll write about it!  For now, thanks for reading!

Next Trailer Girl Blog – 40 Acres and Why You NeedIt 

Choosing an RV Park

Let me begin by telling you about Fishermen’s Bend.  We were driving from Seattle to Southern California and were passing through the Sacramento area.  We were just staying one night.  Before the days of Yelp and Google reviews, one had to rely on RV Park Guides.  They were kind of like the motel guides you can get from AAA, but without the diamonds to tell you nice the place is.  My husband picked it because it had a pool and he thought it would be nice for the kids to go for a swim after a long day in the car. 

The RV park was eight miles off the road.  That should have been our first clue.  We drove into the RV park and it had a very strange, kind of creepy vibe.  Being newbies, we tried to ignore it.  As we drove through, people who were sitting outside of their trailers stared at us.  We began to notice that most of the rigs in the place were pretty run down and some had flower pots and add on porches.  Having pretty much only stayed in State Parks, we found this odd, but weren’t really sure why.  Then, we drove past the pool.  There were kids in it, but the water was a funky color.  That’s when I said, “This is too weird.”  My husband responded with, “Yeah, it reminds me of that Stephen King book ‘Deliverance.’  Let’s get out of here.”  We bailed and found another place down the road right off of the with newer looking rigs and decided to stop there.  We took the kids to the pool where they lasted about 5 minutes because it wasn’t heated and the water was icy cold.  The rest of the evening we kept to ourselves inside the trailer and we left first thing in the morning.

What we learned later was, Fishermen’s Bend was full of migrant farm workers.  There’s nothing wrong with people actually living in an RV park. With all the live ins, it made us look like aliens because no one else ever stayed there.  Hence the stares.  To make matters worse, it was a poorly kept, very run-down park.  This park taught us a lot about how not to choose an RV park.  

Luckily, choosing an RV park has become much easier since the Fishermen’s Bend days thanks to advances in the internet and RV parks finding it important to have websites.  Yelp and Google reviews are a help too but, they can be deceiving.  You never know who writes these things!  Here are a few pointers that we use that have served us well.

First, you need to figure out how it is you want to use the RV park.  Will it be a destination spot?  For instance, will you be staying for a week near a National Park?  Will you just be staying a night and not even need to un-hitch.  Will you be bringing kids that will drive you nuts if you don’t dump them in a pool for an hour or so?  Do you have a dog with you (some RV parks have dog parks)?  Will you need to do laundry?  Do you need full hook-ups?  Are you like my brother and prefer a boon-doggle on a fire service road someplace?  Do you need a bunch of trees to block the view of the neighbors?  These are things to take into consideration.

We do a lot of one night stays on the way to someplace else.  In those cases, I find us a nice big pull-through and we don’t un-hitch so that our get-away is faster in the morning.  When we are on a trip, I usually pony up the extra $20 or so to upgrade the site.  In most cases this gives you a little more room.  Sometimes it gets you something really cool like a fire pit and a gilder swing. Sometimes, you wonder what you just paid for until you go for a walk and see what the little sites are like.  

For destination places (and by “destination” I mean places you’re going to stay for longer than a night or two because you’ll be exploring the area around the RV park).   I go on the website map and look at all of the “premium” sites.  Then, I call and ask, “What one of the sites available for my dates would you choose if you were going to stay in your park?”  I’ve gotten some great help this way.  People at the parks will ask more questions like if I’ll be traveling with pets.  Maybe then I’d like a spot on an end with more grass.  Is the park on a lake or near water?  I always try to get a waterfront site.  In some of my favorite places, I’ve had to learn to call 375 days in advance so I can get one of my favorite sites.

Here are my rules of thumb for choosing an RV Park when you’re going someplace new and you don’t have any recommendations from someone who has already been.

  • Figure out where you want to go and Google “RV Parks Near _____” – see what comes up. Begin your search with what comes up.
  • Always look at the RV park’s website– If they don’t have a website move on to the next place on the list.  It might be Fishermen’s Bend!
  • Check it out on the map – If it’s too far off the road, it might be creepy. 
  • Check the amenities – Do they have the things you’ll need like hook-ups, laundry, etc?
  • Once you’re on the website, look at the photo gallery – if they don’t have a photo gallery, what are they trying to hide?  If they do have a photo gallery, look at the park.  Is it well kept? Do they have a picture of the restroom and showers?  Not that you’ll ever use them if you have your own.  But, if they’re not clean in the photos, move on.  Are there big rigs in the photos?  Newer and bigger rigs often mean that more people are using the park for vacation purposes.  It changes the vibe of the park and it’s fun to visit with people in the park who are traveling like you are.
  • Read the reviews – I always read a few of reviews with the most stars and one or two of the worst reviews.  Most of the time, the truth is somewhere in the middle.
  • Call to make your reservation – When possible, call.  You’ll get help finding a good site and you’ll get an idea of the customer service you’ll receive at the park.  The exception – KOA’s do most of their reservations online.  The cool thing about KOA’s is you get picture examples of the sites and a really nice list of the amenities of each site.  
  • Check the website for things to do in the area – One of our most fun trips was a serendipitous trip to Auburn, California.  This was our Gold Country trip we took that we had to plan in a hurry because Whistler, BC was on fire.  Everywhere was booked.  I clicked the “things to do” button and found out about white water rafting in the area. It was an awesome rafting trip!  We had a fantastic time exploring the area, rafting, etc.  If the RV park doesn’t have a button for this, check websites like TripAdvisor or the local Chamber of Commerce website for things to do.

When you’re staying in a State or National Park, things get a little trickier.  In Washington, many of the state parks have photos of the sites.  It’s very helpful because they are persnickety about how long your rig can be in each site. Also, you can see if you’re going to have an issue with low hanging trees.  Depending on the size of your rig, you may want to avoid state park type sites that aren’t for RVs as you can run into problems with trees getting in your way.  

Another fun thing we’ve discovered while RVing is many RV parks have cabins for people to stay in who don’t have an RV.  We like traveling with our neighbors and they don’t have a trailer (yet).  They have stayed in the cabins or at a close by hotel. It might be something to think about when you’re working on your travel plans.

Recently, vintage trailers have become a thing.  Some parks are now putting renovated vintage trailers in the parks and you can stay in the trailer.  There’s a park with lots of vintage trailers in it that is on my bucket list!  I need to stay there and go for a walk through the vintage section, but stay in my own trailer with all of my modern creature comforts!

Using these rules of thumb, we have found some great RV parks.  We’ve met some really great people and we’ve also learned about new places we want to visit by hearing about other people’s experiences. I love RV parks!  I love going for walks and looking at other people’s rigs.  I love chatting with people who are on trips.  I love hanging outside of my trailer in my camping chair. I love the experience!   I hope these tips help you have a better RV park experience.

Next Trailer Girl Blog – Parking the Trailer and Staying Married

Why a Trailer?

misc &.Glacier trip 058

That’s what someone asked us when they saw our first trailer parked in front of our house. “WHY?!” As if to say, “Are you insane?! What could you possibly be thinking?” I’ll tell you what we were thinking. We were thinking we wanted to go places where airplanes don’t land and hotels are scarce. We were thinking that we wanted our kids to have memories of family trips and adventures that they’d tell their kids. And, we were thinking that tent camping was getting to be a big hassle….

Let me tell you about our last tent camping trip. It was to Big Sur, California. We were to drive from our home near Seattle, Washington to meet our California family for a camping trip. Sounds fun, right? We spent an entire day packing our mini-van to the brim with camping gear, coolers, stuffed animals, favorite blankets, juice boxes, snacks, a TV/VCR combo, headsets that plug in to the TV/VCR thing, and enough VHS tapes to keep a 3 and 7 year old happy for 18 hours on the road and the parents sane. We were ready to go! It only took about 20 hours, but we were ready!

Our first night, we stopped at a hotel in Redding, California. When we got out of the van, it was 108 degrees outside. We now refer to weather over 100 degrees as “Redding Hot” in our family. My daughter had finished her book and we decided to leave Dad and little brother at the hotel to rest and we set out to find a new book. My husband suggested that when I get back that I park under a tree so that it doesn’t get too hot in the van. And, that’s what I did. Good job me!

We had a lovely evening! We went to dinner, played in the pool, and let the kids stay up late so they’d sleep in the car the next day. We did everything right! We got up early to get a good start for the rest of our drive. When we opened up the van, we discovered that we had about 1,000 new passengers. ANTS! It turns out, I had parked so that the nose of the van was on an ant hill. Way to go me! We stood there trying to figure out what to do. It wasn’t like we could stop at the hardware store, spray a can of Raid, and then lock the family up in the car. We found a can of hairspray and dishtowel and began a spray, kill, and flick routine and got as many ants out of the van as we could. We got on our way about 30 minutes later. That was only the beginning of a ridiculous day.

We lost the map when we got it mixed into our Denny’s menus. Then, a car came careening straight at us and crashed into the jersey barrier. We were a little shaken up and weren’t sure where we were so, we stopped for gas and a new map and flicked out some more ants. We arrived in Big Sur later than expected and tired only to have to unload the van and set up camp.

We got the tent set up while the kids played with their cousin, aunt, uncle and grandparents. The next thing was to blow up the air mattress. Of course, it popped as soon as we got some air into it. My husband had had enough and said, “I’m going to Monterey. Don’t wait for me to do anything. I’ll be back later.” My California family was worried about him. I wasn’t. I was sure he was A) buying a new air mattress B) getting a Starbucks, and C) standing with his feet in the ocean.

The rest of the camping went without any major incident except for the typical hassles of camping. For instance: fetching water to do dishes, heating water to wash said dishes, and finally, washing said dishes. It can take 30 minutes just to wash a cup! Oh, and let’s not forget how much fun it is to camp with a three year old who loves the dirt and try to clean him up in a shower that you have to feed quarters into. Not to mention, he was terrified of the shower and you could hear him screaming all over the campground! (That part, was a little bit funny and some of his shower commentary has made it into family vernacular!). We also really enjoyed having to take turns to go up to the bathroom to brush our teeth so that one of us could stay behind because our kids were in the tent – NOT! Then, there were some of my personal favorite daily tent camping chores like draining the water out of the cooler, filling it up with ice again, and loading all of the food in and out of the van ever time we needed to make a meal. We were really getting done with tent camping.

My parents were camping in a camper on the back of my dad’s truck. After the campfire, marshmallows, and hot chocolate, they’d just say good night and climb in. No taking turns to go down to the bathroom to brush their teeth. No blow up mattress. No cooler. It seemed so much easier.

On the drive home we started looking at what towed what. We made up our minds that we would begin the search for a trailer and a tow vehicle that this preschool carpool mom could drive. When we got home, we put the tent in the attic. I’m pretty sure it’s still up there having never moved.

We spent the next 8 months going to RV shows, checking out trailers on RV lots, checking out tow vehicles with passenger space, and crunching numbers. In the spring of 2004, we bought our first trailer and a Suburban we called, “Clifford the Big Red Burb.” That was the beginning of 14 great years of family trailer adventures that we wouldn’t trade for anything! Our kids are now 19 and 23 and we’re on our second trailer. We’ve done just about everything wrong over the years and have learned a lot!

I hope you enjoy this blog and I share what I’ve learned along the way (that you can’t find in my favorite Magazine, “Trailer Life” – you should subscribe! My first bit of trailer advice). Fair warning! This blog will be somewhat “girly” in that I know almost nothing about hitches, sway bars, back up cameras, etc. What I know and will be sharing are things I’ve learned that make trailer/RV life more comfortable and fun … like which kind of towels to buy if you want to use a dry towel …ever and how not to burn the bottoms of your cookies in your RV oven. The little things that make it more enjoyable!

Coming up in my next post: Trailer/ RV Shopping – The stuff you really need to know!

Our 2004 KZ Frontier Trailer and “Clifford The Big Red Burb”