Winter RV Blues – Tips and Tricks for Keeping Upbeat in the Winter

We live in the Pacific Northwest.  To be fair, this is the first season we’ve done the full-blown winterizing for our trailer.  In the past, my husband has just blown out the lines with an air compressor and left the faucets open.  We only had a problem once.  (I’ll tell you about that at the end.) It makes me sad to think that we can’t just take off whenever we want.  It’s going to take a little more doing to take a winter trip, and a little more re-doing. It might be hard to talk the guy who has to do all this extra work into taking off for a weekend.  You’re probably wondering how I’m even qualified to write this blog post.  Like I said, I live in the Pacific Northwest.  I moved here from Southern California 25 years ago.  It’s dark, it’s cold, it’s wet … YUCK!  Trying to keep in in good spirits in the winter has been a challenge since our first winter here.  Here are some things I do.  Surprise, surprise!  Many are travel related! 

  • Leave town! – I try to get out of the area in the winter for a while (sometimes I even bring the family!).  I usually use an airplane instead of a trailer in the winter.  I’ve been on several mission trips to Nicaragua, visited my brother and his family in Southern California, visited my husband on his business trips to Florida, and this year, we’re going to Hawaii.  Warm places and sunshine are good for the winter blahs.
  • Drink coffee – You wonder why Starbucks is such a big deal in Seattle?  Cheap anit-depressant in a cup.  There ya go!  It helps!  Coffee with friends is even better!
  • Plan our next trips – I usually have our summer trip planned and booked sometime in March or early April.  Having this to look forward to is a huge help.  I try to plan and book a trip for each month from March through October.  
  • Do fun winter things – A few years ago, we took up snowshoeing.  We live about 40 minutes from some great snowshoeing trails.  Going up to the mountains for a day of getting out in the snow is fun and makes us appreciate where we live a little more.
  • Have hibernation days – We sometimes have lazy days in the winter where we hang out at home, watch movies, wear sweats, and just don’t go anywhere.  We savor these days a bit because, in the PNW when it’s nice out, we feel guilty if we’re not outside working  in the yard, hiking, walking the dogs, or otherwise just getting out.
  • Catch up with friends – We have friends who we hardly see all summer because our schedules don’t line up.  They’re out of town or we’re out of town.  They have out of town guests or we have out of town guests.  Whatever!  Winter is a great time to call your friends and get together.   
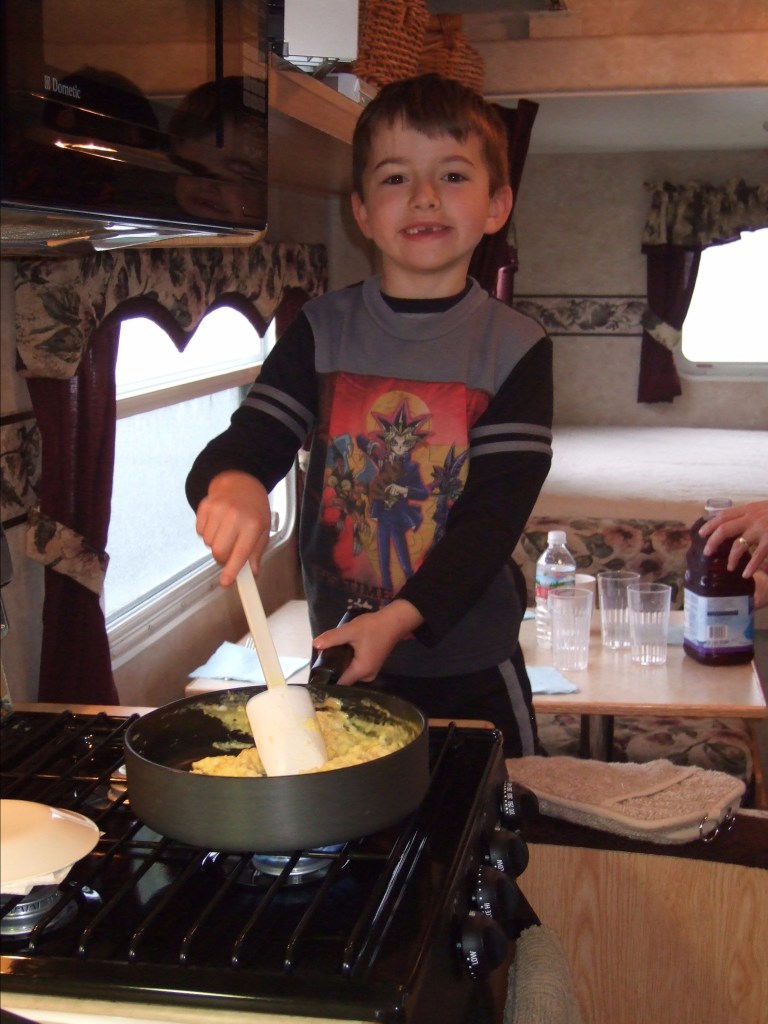
  • Try new recipes and make notes about which ones will be good RV food – I love cooking.  There’s no better time than when it gets dark at around 5 p.m. to try new recipes.  It’s not like I can be outside working in the yard.  I might as well cook!  
  • Get outside daily – I have dogs.  They make me go outside.  If I don’t walk them every day, I pay for it.  So, every morning, I get up, look at the temperature outside and complain “It’s stupid cold!”, put on several layers, and take the dogs for a walk.  Once I’m out the door and a few blocks away, I appreciate being outside and getting some fresh air.   It also gives me time to think about where I might like to go in the summer….
  • Get enough exercise – There’s nothing worse than hanging out inside and feeling like a blob!  It adds to the blahs, messes up your sleep, and generally makes everything worse.  If you’re snow-bound, you can probably find an exercise video on YouTube that will help.  If you’re not, get out and walk or go to the gym.  You’ll feel better, I promise!
  • Go somewhere in the winter in your rig – If you can get out – go!  We have a favorite spot that’s easy to get to.  There are no snowy passes to go over or anything scary like that.  We’ll go there in the winter sometimes just to get away.  One time, we went and we didn’t follow the directions on the sign that said, “If it gets to freezing temperatures, city water will be cut off to the RV Park.  Make sure you have enough fresh water in your tank.”  That was a bummer … for me!  I didn’t get to use my own shower and had to use the RV Park shower that you put quarters in.  My son and husband found my getting flustered with the whole situation very entertaining.  Now I know better!  I’ll be asking about the fresh water tank!  This year, we went out in March after our Snow-mageddan to Mount St. Helens.  There was still snow in places.  It was cold and we ran out of propane and woke up freezing.  That wasn’t fun either.  Another thing I have to remember to ask about….  The moral of these little stories – make sure you’re prepared if you’re going out in the winter!
  • We’re considering snow-birding – When we retire, and if we’re still living in the PNW, we’ll probably be on the road most of the winter in warmer places.  If you have this ability, I would highly recommend it!  We had some neighbors when we first moved to the PNW that were snow-birds.  We always knew when they were back because their swan planter showed up in the yard.  They wintered in Florida and loved it.  I thought they were old and crazy at the time.  I now see the wisdom in their choice and plan to copy them in our own way!
  • Go to RV Shows – Are you thinking about a new rig?  Are you curious about some rigs you saw on some of your trips?  Go check them out an RV show.  We have gone to RV shows as total looky-loos.   We’ll go find the most expensive rig and see what kind of crazy things they put in it.  We’ll look at newer versions of our own rig.  Whatever, it’s always fun to look!  My husband was out of town for the Winter RV Show in Seattle.  When our trailer was in the shop for our Memorial Day Trip and our trip got cancelled, he decided he owed me an RV show.  There wasn’t one going on so, we decided to go look at Fifth-Wheels.  In order to make it a little less exhausting, we picked out about 6 different rigs on 3 lots that we wanted to look at.  That turned out to be a little dangerous.  We ended up buying our Fifth Wheel while our old rig was in the shop!   It was a little sooner than we had planned, but we are really happy with how everything worked out!
  • Get professional help – If your blues are hanging on, please get help.  Seasonal Affective Disorder is real.  There are lots of ways to treat it.  Hanging out and feeling sad all winter shouldn’t be an option.

So, you’re probably wondering about that time when we had the winterizing fail.   It was our first trailer and our first winter with it.  Sixteen years ago, RVs didn’t have as nice of sinks and faucets as they do now.  Most of the sinks were small and the faucets were some version of the cheapest kind you can find at Home Depot.  Our trailer was no exception to the crummy sink and faucet combo rule.  I really hated the faucet because you couldn’t fit a pan under it to wash it.  It was dumb!  It was probably set up by someone who ate microwave dinners all the time.   We forgot to leave the faucets open on the sink.  My husband went to go pick up the trailer and there was our faucet, broken off and laying in the sink.  YAY!  I got a new faucet that worked much better!  If you like your faucet, don’t forget to leave it open when you store your rig over the winter!

Hang in there!   There are more RV-able months than months where going out is just too cold or too difficult. Find some winter fun, plan your summer, and look forward to being re-united with your rig!

Next Trailer Girl Blog Post – Going to Tourist Towns in Your Rig

Trailer Pizza (AKA Chicken,Garlic & Rosemary Pizza)

This recipe is one we made on our first ever trailer trip and completely burned the bottom of it in the trailer oven. We had to scrape off all the toppings and eat them for dinner! (See my blog post called “Don’t Burn Your Biscuits” for tips on how to deal with RV ovens). It became a trailer trip staple because I can get it going while my husband was outside getting the trailer set up. I can have it in the oven and side salads ready to eat by the time he gets done outside. It works great! We now officially refer to it as “Trailer Pizza” even when we eat it at home. Hope you enjoy it!

Ingredients

  • 1 Pilsbury canned pizza crust
  • About 8 oz Chicken cooked (I use frozen chicken tenders and cook them in a Pampered Chef micro cooker with water in my microwave)
  • 1 Sprig of Rosemary – chopped
  • 2 Cups Shredded Mozzarella Cheese
  • 2 – 3 Cloves Garlic
  • 1/2 Medium Red Onion – thinly sliced
  • 3 TBSP Olive Oil
  • 1/2 Tsp Salt

Directions

  1. Heat oven to 425 degrees
  2. Pop open your pizza crust onto a cookie sheet and spread evenly over the cookie sheet (I use a rectangle pizza stone)
  3. Mix together: Chicken, 2/3 of the cheese, Rosemary, Garlic, and Onions
  4. Add Olive Oil and Salt and Mix together
  5. Spread over pizza crust
  6. Top with remaining cheese
  7. Turn oven DOWN to 400 degrees and bake for 10 minutes. After 10 minutes check it and turn it (unless your RV oven cooks perfectly!), and bake about 10 minutes more until crust is golden on the bottom and cheese is melted. Depending on your oven issues, your cheese may not brown without burning your crust. If that’s the case, turn the oven down again and try getting the cheese to brown a little more.

Next Trailer Girl Blog – Winter Blues – How Not to Get Sad When your Rig is Winterized

Keeping the Driver Happy

My husband and I fall into stereotypical male female roles when it comes to RVing.  He drives.  I cook.  He dumps tanks.  I clean the inside of the trailer.  He washes the outside.  I do all of the trailer laundry.  It works for us!  I can tow a trailer.  I just don’t like it.  Also, I can only go forward.  Multiple people have tried to teach me to back a trailer.  I cannot get it to go where I tell it!  So, if I am driving, there are conditions.  The road needs to be pretty much straight and flat.  I don’t want to have to worry about trailer brakes and when to apply them.  And, if I have to go backwards, it’s a complete deal-breaker.  So, with all of my high-maintenance requirements, my husband does the driving.  

In our 16 years of RVing, I have learned that if the driver is happy, things go much better and the driving days are much more fun.  There are certain things that are completely out of my control (like other drivers) that will thwart my efforts.  If I can do my part to make the driving days go well, even the annoying things that happen on the road are more tolerable.  Here are some things that help us:

  • Driver chooses what we listen to – My husband loves talk radio.  I hate it, but I put up with it for the drive because he’s taking me someplace cool with my trailer.  A small sacrifice on my part.   Raising kids and working with kid musicians has taught me to tune out a lot of things.  I apply everything I’ve learned over the years to tune out the talk radio.  I also find that if I stash a few magazines into the truck, it helps distract me.  My husband will change the radio to music for me after he gets his fill of the talk radio.  But, as soon as I fall asleep, he changes it back.  It’s funny little car battle we have going. 
  • Driver chooses the lunch stop – For us, this involves much more In-N-Out Burger than I would eat in one trip.  Again, a small sacrifice to get to cool places! 
  • Passenger finds food at the request of the driver – He’ll say, “I want to eat lunch in about half an hour or so.  Can you find an In-N-Out in the next town.”  (Or if there’s no In-N-Out I find out what they have and read him his choices).  Then, my job is to put the address into the GPS for directions and find 40 acres to park in.  
  • Passenger helps look for hazards – My job whenever we’re leaving a parking lot, getting onto a road, or pulling into or out of a gas station is to help look for hazards.  I look out for height restrictions, sharp turns, other cars, landscape planters in parking lots, etc.  Sometimes, I even get out and help him navigate around things until he’s clear. 
  • Keep road conversations fun – Most of the time, we talk about what’s going on the road, make fun of signs and names of towns, or things that are basically light-hearted.  We don’t have major discussion about things like our finances for instance.  
  • Play the license plate game – We used to play this with the kids. We had a wooden game where the kids would flip over the license plates we found.  The kids got so OCD about this game one time that they wouldn’t start a new one until they got all 50 states.  It took close to a year to finish because we couldn’t find Rhode Island.  For Christmas, I bought them a Rhode Island license plate from ebay so we could start a new game.  Now, Rhode Island is like a free space in BINGO.  My husband and I now play using an app on my phone.  The game continues in whatever parking lots we’re in on the trip.  National Parks and RV Parks are great places to find license plates from all over the U.S.
  • I make the trailer a comfortable place to flop when we arrive – While he’s outside hooking things up, I get the trailer ready for hanging out it.  I’m in charge of slide outs and setting up the inside of the trailer.  
  • Make good meals – I love to cook.  I love planning the meals we’ll eat on the trip.  My husband has a list he made in the notes in his phone of favorite dinners.  He’ll  sometimes make requests for trips.  It depends on the length of the drive as to what we’ll have when we arrive in an RV park.  I try not to plan something that requires the grill or setting it up on a driving night to keep the work to a minimum unless he says he wants one of the meals we’ve planned that calls for grilling.

There are lots of ways to make your drive more pleasant.  Talk it over with your driver or passenger and decide what would make your driving days more fun.  Driving shouldn’t be stressful every time.  There will be times you can’t avoid a miserable day on the road.  We call those “Griswold Days” and try to find the humor in the situation.  Of course, sometimes those days don’t get funny until after the trip!  At any rate, don’t dwell on what all is going wrong.  Keep your focus on the adventure and your destination.  You’re on vacation!  Enjoy the ride!

Driver Edit: On non-travel days, the driver tries to keep the cook happy!  

Next Trailer Girl Blog:  Trailer Pizza – The Recipe

Why I’m Banned from Barstow

I’m a 50 something woman who has never been in trouble with the law outside of a few speeding and parking tickets.  You might wonder who would ban me from Barstow, California.  My husband, that’s who!  He said I’m not allowed to set foot in Barstow ever again.  If we’re ever traveling through, he’s going to keep on going …no stopping!

We were on our first kid-less trailer trip.  Our son needed to catch up on some school and our daughter was working.  They turned into perfect house and dog sitters.  At the time, they weren’t getting along consistently.  So, we decided to leave them each (separately) money for food and then, offered them house and dog sitting money under the condition that we didn’t get any calls to break up arguments or solve problems for them.  If something broke, it was up to them to figure out how to fix it or live without it until we got home.  It worked out really well!  We got no calls or texts and it made for a really fun time away.

We were well into this two-week trip.  We had been to Zion National Park and climbed Angel’s Landing and hiked the Narrows (we highly recommend those hikes!).  We had been to Las Vegas to visit my husband’s parents and Elvis.  (We learned a LOT the hard way about how to camp in Vegas in the summer!).  We were having a great time!  We were headed to Anaheim from Vegas to make a kid-less trip to Disneyland.  That’s when I got banned from Barstow.

I have always hated Barstow. When we were kids, we would travel from Long Beach, California to Albuquerque, New Mexico in a day. Straight through.  18 hours in the back seat with my brothers….on the hump. My parents liked saving money by getting “liquor store breakfasts” consisting of powdered doughnuts and juice. Yeah, put that in the gut of the kid sitting on the hump who gets car sick!  Great Idea!  Barstow is usually where the doughnuts and juice kicked in and  I felt pretty sick.  In fact, as a kid, I called it “Barf-stow.”  

Thankfully, my husband is totally opposed to a liquor store breakfast.  In fact, a selling point for both of us about RVing is, we can make our own breakfast before hitting the road.  If we have to leave too early, we have a non-nauseating Starbucks back-up plan. It works for us.  When we first started RVing, we would stop and make lunch on the side of the road to save money.   Later, we decided it was more fun to stop someplace (usually, we let the kids pick) and get something at a fast-food place.  Especially, since some of our picnic stops were, well, a little embarrassing to our daughter when she was about 12.  It turns out the grass in front of a bank isn’t so much like a park and it’s not cool to have a picnic there. Now we usually skip the picnics at lunch time and stop someplace like a fast-food restaurant.

My husband may be the world’s biggest In-N-Out Burger fan.  It’s really unfortunate since we live in the Pacific Northwest and there are none here.   He plans our trips so that we leave the RV park in time to hit an In-N-Out for lunch on the road whenever we’re in the land of In-N-Outs. It doesn’t matter to him if we had In N Out for lunch the day before. We’re still stopping!  If you’ve ever been through Barstow, you know it has an exit with just about every fast food option available.  Of course, my husband planned it so we would hit Barstow at lunch time for In-N-Out. This would be our 4th In-N-Out lunch on this trip.  One In-N-Out visit per vacation is fine with me, mind you.

I can’t remember what day of the week it was, but it was a busy day in Barstow!  It was July, and a lot of people were traveling through.  We got off the freeway and headed toward In-N-Out looking for 40 acres to park.  That’s where everything started to go south…..

I spotted an outlet mall. There’s always bus parking at an outlet mall.  Surely, that would be a great place to park!   My husband saw a bank that had a bunch of empty spaces in front and thought he might go there.  Unfortunately, I didn’t speak up before he was headed toward the left turn lane toward the bank and as he says, the launch sequence was already started.  We couldn’t adjust our course toward the outlet mall.

We got to the bank and took up about 6 spaces and he said, “I don’t like this.  You wait here and I’m going to walk over there and see if I can find something better.”  He left the car running and walked off.  Now, we were driving a twelve-year-old Suburban.  One of its many quirks was, the air conditioner only really worked when the car was moving, and it wasn’t, and it was Barstow … in July.  It was getting super hot in the car by the time he got back. He said, “OK, we’re going to go out that exit in the parking lot and park over there by that outlet mall.”   It would have really helped if he would have added, “right where you suggested,” but he didn’t.

OK fine!  We’re all parked by the outlet mall and by now, I’m really hungry and overheated.  Off to In N Out we go. We have great teamwork when it comes to In-N-Out.  He gets in line to order and I “vulture-ize” the tables.  As in, I stand and watch for someone to get up and swoop in and take their table when they leave.  Well, I did my vulture-izing and got us a table.  I waited …. And waited…..  As I was waiting, I was staring at a Chipotle sign and a Panera sign and thinking, “I bet we’d have our food by now if we ate over there.”  45 minutes (yes, you read that right 45 minutes!) later, he comes out with the food and says, “There was a whole tour bus right in front of us!”  Of course, I was completely grumpy by then. He’s all happy because he has his In-N-Out.  He didn’t care how long it took him to get it!   He couldn’t understand why I as so annoyed.  I had to explain.  That’s when he said, “I’m NEVER taking you to Barstow again!”  (YAY! I never have to go to Barstow again!!)

The obligatory In N Out selfie. One of us was happy … and it wasn’t me!

We ate, I got less grumpy, and we got on the road.  About 20 minutes down the road in Victorville, we spotted another In-N-Out from the freeway. It had its own 40 acres of parking and hardly any cars in it!   We agreed, Barstow is jinxed and we’ll just have to move on next time!

Not every day or every moment of RVing is wonderful!  Sometimes, you have to make a joke out of your situation.  Barstow has been a long running one and a reason why we pay closer attention to the google earth map when we’re planning our stops.  I hope you found our Barstow story amusing.  Maybe you have your own version of our Barstow story.  I hope you’ve been able to find the humor in it and make it part of your vacation humor.  

Next Trailer Girl Blog – Keeping the Driver Happy

Having Guests in your RV and our Adventure with Our Trailer at the Airport

Let me begin this blog post by saying I probably have no business writing it.  I am in a Facebook group for owners of our rig’s manufacturer.  I thought I knew what I was doing until I saw pictures of peoples’ beautiful spreads they put out at the national rally last month. Suffice it to say, I’m a low-key entertainer and I like it that way.  

When we purchased our current 5thwheel one of the things we shopped for was more visiting space.  Not more sleeping space.  We tested the pull-out bed in the sofa to make sure it was comfortable so that we could have over night guests.  If it wasn’t, it would have been a deal breaker.  It turns out, the pull-out bed is more comfortable than the bunks in our old trailer.  Go figure!  We wanted more visiting space because we end up camping in places where we’re visiting other people, or people come to visit us.  It’s fun!

If you’re still shopping and you think this might be your situation, you might consider something with an island in the kitchen and a living space near the kitchen.  It makes for great visiting, snacking, and fun. We purchased our rig in May. Since our purchase, we have camped 20 nights in it on four separate trips.  On only one of those trips were we without visitors.  Our “rear living” / island kitchen has served us very well! We love it!

Here are some things I keep in mind when entertaining in my rig:

  • K.I.S.S.– My geometry teacher in 10thgrade always used to remind us when solving proofs, “Keep It Simple…Stupid.”  (I seriously doubt he was calling anyone stupid!  I think he was trying to get teenagers attention after lunch).  Back when my kids were little and before we had a trailer, I tried to be my own version of Martha Stewart.  I pretty much failed at it because I turned into a crazed over thinking entertaining machine that my family dreaded.  Therefore, they dreaded any party I’d throw.  It was no fun for them!  Now that I’m older, and wiser (Ha! More like older and more tired!), I’ve realized that no one cares how fancy your party is.  They care that the company is fun.  These days, sometimes I even leave the chips in the bags! (Gasp!).  Really, make it fun for you!  Don’t go overboard!
  • Plan ahead –I really love to cook.  When I’m camping, my cooking is much simpler.  I marinate meat before the trip and freeze it, make simple salads, make things ahead when possible, etc.  That way, when I’m ready to have guests, I can pull things out and go.  No major prepping in the rig.  
  • Grill!– Everyone loves good grilled food!  You can grill anything.  I know someone who grills peaches and says they’re delicious.  I prefer steak, but whatever!  When you grill, it brings people outside, keeps your rig cooler, and makes less dishes to wash.
  • Easy clean-up is key –Most rigs don’t have dishwashers.  Mine doesn’t.  Easy clean-up is a big deal.  Use recipes and foods that are easy to clean up.
  • Whenever possible, invite people who help –So far, we’ve been super lucky this summer with company that helps.  On our first trip out in our rig, the people we camped with wanted to cook for us in our rig. It was awesome!  We just watched as they cooked.  Later, we washed the dishes while they watched.  When we camped with my brother and sister-in-law, they were super helpers.  My brother loves grilling and cleaning the grill, so he cooked all of our grilled meat. My sister in law likes drying dishes (or pretends to) and jumps up to help as soon as anyone is at the sink.  Having people like this over makes entertaining a lot more fun.
  • Order pizza!– In our favorite place to camp, we love the pizza place in town! We order pizza and bring it back to the trailer.  We’ll make salad, have wine and drinks ready, and have a fun, easy, and delicious dinner.
  • Pot-luck it– We have friends that we camp with regularly.  We eat together on the nights that we’re camping together. When we don’t order pizza or do something “organized,” we’ll have a BYOM (bring your own meat) pot-luck.  We share sides, salads, drinks, etc.  Then, for dessert we’ll have s’mores.  It’s fun!

Overnight guests

We are in a new phase of life.  We’re empty nesters.  For 15 years, we had bunkhouse trailers.  Our first rig had 4 bunks and we let our kids bring friends on our trips sometimes. Other times, we parked it in our driveway when we needed more sleeping space at the house and sent some kids out to sleep in the driveway.  My brother and his family would come up to visit, but there is no hotel in our town and no room in our house.  So, we parked our trailer in the RV park and they stayed in our “vacation condo.” This past summer, we realized that our kids hadn’t come on a long trip with us in years and that we were only using the bunkhouse for was storing my husband’s golf clubs.  We decided it was time to re-think the bunkhouse situation. We bought a 5thwheel with a comfortable pull out sofa-bed (Not a jack-knife sofa.  Jack Knife pull outs are only comfortable for kids!).  It turned out to be a good choice.

My brother and his family have a 23-foot travel trailer.   They rarely ever camp anywhere with hook-ups and sometimes tease us about how wimpy we are for going to RV parks.  They live in Southern California where he owns a landscape business.  Getting away for more than 7 or 8 days at a time is really hard for them.  As a result, it’s kept them camping mostly in California, Arizona, and Nevada.  We let them know we were planning a trip to Glacier National Park.  At the time, we had our bunkhouse trailer that they had used in the local RV park when they came up to visit us.  My brother said, “We’ll come!   We’ll fly up to Montana and we’ll camp with you and sleep in your bunk beds!” A plan was hatched!

After we hatched the plan, we traded in the bunkhouse and sweated a bit about whether or not having guests on the pull out sofa bed was going to be a good situation.  We did our best to make it as comfortable as possible. Here are some things we did:

  • Got a good mattress pad for the pull out– Even though the pull out is comfortable, it’s still not a mattress.  A quality mattress pad helps with that.
  • Got quality bedding – Nice sheets, comfortable pillows, and a nice quilt made the bed a lot more comfortable.
  • Found space for them to unpack their bags – Suitcases in a trailer would be a trip hazard! Our new rig has a cupboard that is “extra” for us.  We decided to keep it empty so that if we have guests, they can put their things in there.  They unpacked their suitcases into the cupboard and we stowed the suitcases in the basement storage of the trailer.  It worked great!
  • Made space in the medicine cabinet – Our medicine cabinet is HUGE for a trailer. We made one side of it empty so it could be just for them.  
  • Find places to hang towels – We live and camp in the Pacific Northwest.  It is imperative that we have places to hang wet things inside the trailer.  We put some hooks in the “hallway” of the trailer for this.  Our guests used them to hang their towels.  
  • Gave them space – We made it a point to go to bed at a decent time and let them have the living space to themselves.  We watched some TV in the bedroom.  It helped that we hiked almost every day.  Everyone was, as my sister in law would say, “knackered.”  We were all ready to flop fairly early.
My brother and his wife on our pull out sofa bed. They were great trailer guests!
Decor note: Our trailer isn’t this white inside. It’s much more “dirt – beige.” The ability to camouflage dirt was a big selling point. Don’t go thinking I’m some sort of person who can keep white furniture clean while camping!

You’re probably wondering where our airport adventure fits into this post.  Well, on this trip to Glacier, my brother and his wife flew into Kalispell, Montana.  We had a great plan.  We used Google Maps and found a Cabela’s with 40 Acres of parking and a Chick-fil-A in the parking lot.  The plan was for them to take an Uber to the Cabela’s parking lot.  We had a meeting time.  It was a great plan!

We were coming from Coeur d’Alene, Idaho where we had spent a night on the way to Montana.  We stopped in St. Regis, Montana to buy a Huckleberry Pie (very important to the Montana experience), some jam, and use the restroom.  There’s a really great traveler’s stopping place there with a great store, restaurant, espresso, ice cream, etc.  We looked around a bit, but not terribly long.  When we got in the truck, we were shocked at the time!!  How was it possible that we had spent an hour and a half in that store?!  I checked my brother’s flight on my phone and it said it was late.  Perfect.

We started booking down the road when I got a text from my brother, “Just landed.”  I looked at the GPS and we were 80 miles out.  So, I texted back, “Crap!  We’re 80 miles out!  Take your time getting your bags and getting to Cabela’s.”  We continued on trying to figure out where the time went.  Later we got a text from my brother that said, “Uber says ‘No cars available.’  Now what?” We texted back and forth with things like, “Are you working the Uber app right?”  He sent a screen shot of the Uber app.   Looked right…  “How about Lyft?”  Finally, he calls.  “I’ve been walking around the airport and I think you can pick us up in the passenger pick up area.”  We’re thinking, “Obviously, he doesn’t know how tall we are!”  I explain how much clearance we needed and he assured me that since he’s had plenty of time, he’s walked the whole outside of the airport and it’s going to work.

We drove to the airport and picked them up in the passenger pick up area.  Of course, this irritated the people behind us and they insisted on honking.  So, we were throwing suitcases into the back of the truck trying to avoid the 5thwheel hitch and laughing because the scene was just crazy!  

We drove over to the Cabela’s and Chick-Fil-A and had lunch and did some “we forgot__.” shopping.  At one point in the store, I checked my watch and it was an hour earlier than I thought.  Then, I checked my phone to see the time.  Head slap!  We didn’t get the memo!  There was a time change between Idaho and Montana!  We lost an hour!  

The whole trip went really well and we decided that we’ll do it again sometime.  They stayed with us 7 nights and we had a great time.  They reported being comfortable and said they enjoyed their stay.  We might have to avoid the airport, but everything else worked out great!  We are proud to be able to say we picked up people from the airport with our trailer attached.  Not everyone can say that.

Entertaining in your rig is fun.  There are lots of ways to do it from tail-gaiting, to pot-lucks, to just having people over for s’mores.  I see people in RV parks camping with friends and sharing meals.  I never really considered when we bought our first rig how social it could be.  We have been happily surprised at how much fun we’ve had entertaining in our rig!

Enjoy your rig and entertaining at your own speed.  You don’t even have to entertain at all if you don’t want to!  It’s your rig!  It’s your vacation!  Enjoy it!

Feature Photo note: This photo was taken in our backyard at a barbecue with my grandparents. The kid with the big bow in her hair is me. That was our trailer when I was a little kid. My brother and I figured out that it had been about 45 years since we camped together in a trailer by the time of the Glacier trip in this blog. My parents sold it and we were tent campers after that … until we had kids of our own….

Next Trailer Girl blog post – Why I’m Banned from Barstow

My Favorite Things for Storage in an RV

Storage is a tricky thing in an RV.  Closets and cupboards are small, sometimes oddly shaped, and it’s hard to find a place for everything.  I am a neat freak.  I like having a place for everything and everything in its place.  I hate looking for things and I hate messy clutter – especially in my trailer!  I’m on vacation!  Don’t mess up my space!  In our 15 years of RVing and traveling with kids and dogs, we’ve learned a few tricks.

First and Foremost – Choose Wisely!

If you’re still shopping for your rig, make sure you’re thinking about what you’ll want to bring and where you might put things inside. When we were shopping for our first bunkhouse trailer in 2004, we had trouble finding one that actually had room for clothes and food in the length we were looking for. The RV industry has changed quite a bit since then and they are using storage as selling points. So, they better have it already! If you’re already in your rig and trying to figure this all out, keep reading. I’ll find room for your stuff!

Secondly – don’t bring too much stuff!  

It’s not as easy as it sounds!  Especially when you’re traveling with kids!  The less stuff you have, the less you have to figure out where it goes.   We travel around the Pacific Northwest.  The weather is unpredictable.  I always pack way more clothes than I need for any given trip – you know, just in case the weather doesn’t turn out to be what it says on my iPhone!  

Here are our packing parameters.  We have folding crates that we keep in the trailer and use for packing.  We leave them in the living room at home while we’re gone. When our kids were little, we would give them a packing list and their crates, and they weren’t supposed to pack more than would fit in the crate.  That worked great most of the time.  There were a few trips where we had to make an emergency trip to Walmart for underwear, but for the most part, it taught them to be really good packers!  My husband and I use the same rule.  I have learned over the past 15 years how to pile over the top of the crate too.  When we packed for a 10-night trip, I got all of my stuff in one crate …. Piled pretty high! Once our crates are in the trailer, we un-pack it into our closets and leave the crates in the living room of our house.  (See my blog post about Weird RV Closets for more closet tips.)

We also use the crates for packing food but fill the crates up as many times as needed to pack for the trip.  The amount of food we bring varies with our destination.  For one of our favorite go-to get-a-ways, sometimes all we’ll pack is juice, coffee, and some breakfast food and figure out the rest when we get there. There’s a grocery store, a wine shop, and some restaurants that we like in town.   Figuring our meals out while we’re there is part of the fun.  For our 10-night trip, we packed like we weren’t going to see a grocery store outside of a camp store.  It served us well!

Containerize 

If you’ve read any of my blogs, you know that I hate jumbled messes.  So, as a neat freak, I am also a bit of a container freak.  I find stores like the Container Store inspiring.  I’m weird like that!   My love of containers has served us well while RVing.  They keep things from jumbling while we’re on the road.  Here are some of my favorites:

  • Clear Bins.  I have them all over the place in our trailer!  I love them!  I can see what’s in them and they keep everything upright and tidy.
Clear plastic bins are my favorite way to keep things from jumbling on the road.
  • Sterlite or Rubbermaid Containers with drawers.  These are great under sinks or in the bottom of a closet when you don’t have a drawer. Measure your space before you buy.
The drawer adds space to my storage under the sink.
  • Crushable Baskets– These squish into spaces as needed.  We use one for our dirty clothes under the bed.  After our trip, we bring in all the laundry.  Our trailer has to live in storage.  When the laundry is all done, we take the basket with clean laundry back to the trailer in storage.  
I use a crushable basket like this for my dirty laundry. I bring the laundry home, wash up everything, and use it to return any of the clean laundry that lives in the trailer.
I purchased this from the Container Store. Click here for shopping link
.
  • Shower Caddies– Find one that works for your shower.  My new favorite is one with knobs that make the suction cups actually stick.  It’s worth the extra money.  Our stuff stays put on the road.  It’s no fun cleaning up shampoo goo out of the shower!  In our first trailer, there was no place to put a shower caddy, and we had a plastic basket with a handle. It was full of shampoo, body wash, etc. It lived in the shower when we were parked but was put away in the cupboard when we were on the road.  If you use this method, be sure to dry it out before you put it in the cupboard, or you could end up with a whole new mess. See photo below of my new favorite shower caddy from Bed Bath and Beyond.
  • Plastic baskets for cleaning supplies– Things like dish soap, Windex, etc. sometimes leak.  If they’re going to leak, they should leak in a container that’s easy for you to clean out. Also, they’re less likely to leak if they can stay upright while you are on the road.
  • Plastic bins for anything liquid– I have things like olive oil, vinegar, wine, etc. in clear bins.  This way, the contents of the bin stay upright and if there are any leaks, I can just clean the bin instead of my cupboard.
  • Nesting items – Put things inside of other things. Think nesting bowls, pots and pans, etc. I put my dry measuring cups inside my clear glass big measuring/mixing bowl. I can always see where they are.
  • Zippable Soft Containers – I’m sure they have a better name, but I like them because they’re squish-able. If I were to put whatever I have inside of my zipper container in a bin, there might be wasted space and there would be no flexibility for storing things around it. I use these for things like sheets. You could also put seasonal items such as hats and gloves in one so they’re not in your way in the middle of summer. I got mine from the Container Store.
Squish-able Zippered Storage keeps things together and tidy when they’re not in use. I use mine for extra sheets. It lives under the bed. Click here for shopping link

Make use of your nooks and crannies

If you’re like us, when you looked at your trailer at the dealer, you looked at the basement storage and thought, “Wow!  Look at all of that space!”  Then, you put your sewer hoses, water hose, chalks, a few chairs, and a grill in there and thought, “Dang!  We could use more space!”  Many trailers have hidden storage space.  Here’s where to look:

  • Under the bed– if you have a designated “master bed” (some trailers have Murphy Beds), most likely there is some storage underneath.  You might be able to lift the entire mattress and access all the space under your bed easily.  In our last trailer, we had storage under the bed, but it was too hard to lift the mattress.  So, we had drawers built into the bed.  It was a great modification that was worth every penny we spent on it!  Here’s what we keep under the bed:  Dirty clothes, laundry supplies, and a mop.  When we are on a trip where we’ll be doing some hiking, we’ll put our backpacks, trekking poles, and boots under the bed as well.  
  • Under the dinette – If you have a booth dinette, you most likely have storage under the seats.  In all 3 of our trailers, we’ve been able to lift up the cushions, to find a piece of plywood that lifts out to expose storage.  We keep things that we don’t use very often in our dinette storage such as beach towels, a beat-up pot for cooking things like clams, etc.  It’s also a great place to store things like board games.
  • Under the sofa – If you have a jack-knife sofa, you might be able to access storage under your sofa.  We were able to do this in our first trailer.  It was a little awkward to get at.  So, it was best to keep things like extra blankets under there.  
  • Add hooks – Our trailer has a funny little closet that is supposed to be a coat closet. They even went to the trouble of hanging a bar in it for hangers. Only one little problem. The closet is too small for hangers. So, my husband installed several hooks in there. Now we have a place for dog leashes, jackets, etc. We have also added hooks on one of our walls for hanging wet jackets and things.

Create your own storage

We are on a Facebook page for owners of our brand of trailer. It’s fun to see pictures of their modifications. Many trailers in our brand come with a table and chairs. People are building or buying benches with storage and replacing the chairs with these benches at their tables. I think it’s pretty smart! Our rig has a dinette with booth type seating. I love it. It’s comfortable and there’s storage underneath. Maybe there are other ways your can add storage to your rig.

No matter what size your RV is, you can pack it in a way that works for you.  Just remember, before you traveled in an RV you probably packed a suitcase when you traveled.  How did you fit a week in one suitcase?  Maybe you car camped and you shoved your tent, sleeping bags, coolers, and everything in a hatchback. You can do this!  You’ve got lots more space than your suitcase!  How are you going to make it so its functional and fun?  Remember, you’re on vacation!  Have fun!

Next Trailer Girl Blog Post – Entertaining in your RV and our Adventure with Our Trailer at the Airport 

Setting Up your RV Bedroom and Bathroom

Setting up your bathroom and bedroom efficiently and comfortably is one of the things that will help make your RV feel more like a vacation home.  When we bought our first trailer over 15 years ago, it was a big deal to both my husband and I that our trailer be very different from tent camping. That meant no sleeping bags, having things already in the trailer like linens so we didn’t have to pack them, and above all, it had to be comfortable.  Here are some tips.  Of course, everyone’s opinion on comfortable is different.  This is my Trailer Girl opinion!  Take what you like!

The bedroom:

The bedroom has to be comfortable!  Chances are good when you’re on an RV trip, you’re going to wear yourself out driving, hiking, or exploring.  A good night’s sleep can make a huge difference in how your day goes!

  • The mattress– Don’t let the mattress be a deal-breaker when buying your rig.  Odds are, the mattress that comes with your rig won’t be to your liking.  They almost never are!  Our first trailer had a foam mattress (it pre-dated memory foam so it was just plain foam that was covered nicely) and it was great!  We put a nice mattress pad on it and had zero problems!  When we bought our second trailer, it never occurred to us that the mattress might be garbage … and it was!  There was no making it work!  We bought a memory foam mattress from Camping World, put a nice mattress pad on it and slept great after that!  In our current trailer, our mattress seems to be nicely made, but is super firm.  I bought a memory foam mattress pad from Macy’s and guess what?  It’s just fine!  The mattress will be a trial an error thing.  You’ll feel a bit like Goldilocks until you get it … just… right!
  • Sheets– Get your favorite kind of sheets!  Don’t skimp on your rig!  You’re on vacation!  Your sleep is important!  For those of you with strange sized mattresses, like short queens, might I recommend jersey sheets?  I used them for 15 years on short queens and bought full sized sheets (not queen).  The bottom sheet stretched nice and tight over the mattress and everything else worked fine.  
  • Pillows – Don’t demote your old house pillows and put them in your trailer! Get comfortable pillows you love and put them in your trailer.  Again, your sleep is super important!
  • The pretty stuff – Sometimes RV’s come with a bedspread.  I have hated every RV bedspread I have ever met!  They make nice moving blankets and dog beds though! Put a comforter or quilt that you love on the bed.  Add throw pillows that you like.  Add a throw blanket to the foot of the bed and it’ll feel like a cozy B&B!  If you have room on the walls, hang a picture you like.  Our trailer has night stands on either side of the bed.  My side has a favorite picture of my kids.  Your bedroom should make you feel comfortable, cozy, and happy!
  • Your closest – See my earlier blog post on Weird RV Closets for more information on closets.  Some favorite things for closets – velvet hangers!  Not that I’m some princess that needs my clothes hung up fancy.  It’s more that I hate picking them up off of the bottom of the closet after they’ve fallen off the hangers in transit.  There’s lots more information about setting up your closet in my Weird RV Closet blog post.
  • If you’re lucky enough to have drawers – After 15 years of RVing, we finally have drawers in the bedroom!  I put clear dividing bins in the drawers so that things stay neat and don’t jumble on the road.  I also put them in my husband’s drawer.  Here’s what he had to say about that, “Ugh!  You and your bins!!!”  he proceeded to stack his bin under another bin and not use it.  I promptly re-possessed the bin and used it the pantry. If you snooze you lose … your bin! 
Clear bins help keep my drawer neat and un-jumbled.
  • If you don’t have drawers – You can make them by using Rubbermaid or Sterlite storage bins with drawers.  Be sure to measure before you buy.  We used these for years and they worked great!
  • What to keep in your closet/bedroom:  I keep 3 coats in my closet (we live in the Pacific Northwest, so we have various crazy weather); a windbreaker/raincoat, a fleece jacket, and a heavy coat.  I purchased my heavy coat for $27.99 from a souvenir shop. You can find cheap coats that are great for leaving in your trailer at a lot of towns you visit.  They make a great, useful souvenir!  I also keep an extra set of sheets in the storage under the bed.  That way, when I can change the sheets at the end of the trip and be ready for the next trip!  I know other people that have a trailer wardrobe.  We are mostly weekenders and have to keep our trailer in storage.  This would be way too much of a pain to wash everything and get it back to the trailer after a trip.  It’s much easier for us to pack clothes just before a trip. 

The bathroom:

When we bought our first trailer, we thought we should stock the medicine cabinet with all kinds of things we might need like cold medicine, Tylenol, cough syrup, etc.  It turns out, we’re rarely ever so far from a pharmacy or a grocery store that that is really necessary.  Everytime I’ve moved out of a rig, I’ve emptied out 3 years past expired medicine.  So, now we only buy as needed and buy the smallest size.  One thing we always keep on hand, Tylenol PM because sometimes you wear yourself out hiking or exploring and you need to sleep great so you can get up and do some more the next day!  

  • The medicine cabinet– We keep things like toothbrushes, toothpaste, deodorant, and other toiletries in the medicine cabinet so we don’t have to pack them each time.  I like Clinique skin care products.  I save my purchases for when they have a free gift (they almost always have one somewhere!) and use all of the samples in the trailer.  Pack your medicine cabinet with things you use every trip (or almost every trip).  
  • Earthquake hits the medicine cabinet! – This is what happens to your medicine cabinet when you’re on the road.  Everything is on its side, slid over to one side, etc. It’s a mess!  I am known as the “Straightening Up Fairy” and fix it.  I recently purchased some long skinny clear bins that help hold things up.  The Straightening Up Fairy has been much less busy straightening up.
  • Towels and where to put them – If you ever want a dry towel, don’t buy nice luxurious thick towels!  Get the fast-drying kind.  RV bathrooms usually come with a towel bar challenge – as in, where the heck are you going to put a towel bar?   For 15 years, we had one hanging over the door and hung everyone’s towels on it.  For the first time, we actually have a spot for a normal towel bar.  We keep an extra set of towels in the trailer so that we can put out fresh ones for the next trip at the end of a trip.  
Over the door towel bars can be a good towel rack solution for RVs
  • Toilet paper and where to put it – RV toilet paper is a strange subject.  We use one-ply from the normal grocery store and have no problems with our tanks and sensors.  You don’t have to buy the fancy, expensive stuff from the RV supply. Our first two rigs had no place to put a toilet paper holder.  Like most RV bathrooms, our first two were tiny and you could reach the inside of the cupboard from the toilet.  That’s where the toilet paper lived.  (Aren’t you glad you read this?  These are the things nobody ever tells you!).  We were pretty excited when we bought our current trailer because we found a place to hang a toilet paper holder.  It’s the little things….
  • Shower Caddies – I could write a whole blog post about shower caddies!  I found one I love at Bed Bath and Beyond that has knobs that make the suction cups actually stick to the shower wall.  We just traveled over 1,000 miles and everything stayed put!  
  • Blowdryers, curling irons, etc – Let’s face it, we need our stuff!  I keep one of each hair tool that I use at home in the trailer.  Be careful when using them in your trailer.  I’ve had to re-set the GFI because I tried to use the blow-dryer when the air-conditioner was on and messed up the power to the trailer.  Also, beware of weird RV park electrical issues.  I’ve blown out a hair dryer motor and melted a curling iron.  Someone who knows things about electrical things could probably tell you why.  This might be a time not to put your best stuff in your trailer – just in case.  

The most important things when setting up your trailer bedroom and bathroom are to make it your own, make it comfortable, and make it work efficiently for you.  You also want to avoid packing things every trip like toiletries, towels, etc. so that getting ready for a trip isn’t exhausting. Always remember, you’re on vacation!  It shouldn’t be a bunch of extra work!  Enjoy your set up and your time in your own little portable B&B!

Next Trailer Girl Blog Post – Favorite Things for Storage

Setting up your RV Kitchen – Maximizing Space and Efficiency

Setting up your RV Kitchen – Maximizing Space and Efficiency

Eating together on vacation is fun! Sitting around the dinner table talking about the day’s adventures is a great way to connect as a family. In the feature picture for this blog post, are my parents who got us into RVing, my kids, and my husband getting ready to have a little brownie party in our first trailer (notice the awful upholstery that I wrote about in my last blog about decor.) Our first trailer had a galley type kitchen with very limited space, but we made it work.  Our second trailer had quite a bit more space for the kitchen, an island, a real pantry, etc.  Our new 5thwheel has a kitchen that has more space than my first apartment!  I’ve learned some things along the way that have helped us have an efficient kitchen and more fun cooking.  I’ve also learned, I can probably never go back after having actual counter space!

Two key things to keep in mind when you’re setting up your kitchen:

  1. You are on vacation!  This is your vacation home!  Don’t take all of your beat-up hand me downs out of your home kitchen and put them in your trailer.  Fill it with dishes you like (that won’t chip or break), quality cookware, and utensils that work for you.
  2. Keeping other people out of your way will make cooking in an RV kitchen lots more fun.  In our first trailer, the kitchen was a pass-through area between the door and the living/dining area.  We called that kitchen a one-butt kitchen in that only one butt could be in the kitchen at a time (unless, of course, the other butt was drying the dishes!).  So, we put the silverware drawer under the coat closet and the dishes in the drawer under the dinette.  That way, when it was time for anyone to help, they were out of my way while I was cooking.  Now, we have an island.  The silverware drawer is at the end of the island that’s furthest from the stove.  The dishes are in the cupboard at the end of the island.  This works for getting help setting the table and it also works beautifully for washing dishes and putting them away.  They go from one side of the sink dirty, to the other side dried and put away.  Think through your kitchen and how you’ll use it. Then, put things away in a way that works for you and your family.  If you’re already in your RV and are bumping into each other, fix it!
My son, Ben at the age of 5, in our first trailer standing on the dinette, helping cook. Notice my husband in the background working on setting the table – totally out of the way. (Ben is now 19 and serving in the US Marine Corps. He helps cook when he comes home!)

Other tips for kitchen set up:

  • Non-slip shelf liners are your best friends– This keeps your dishes and things from sliding all over the place while you’re on the road.  Line anything where you put things that you don’t want slipping around.   Here’s a link to it on Amazon:  https://www.amazon.com/Gorilla-Grip-Original-Non-Adhesive-Cabinets/dp/B07773PQG7/ref=sr_1_3?crid=1Y6QH5E4THPOT&keywords=no+slip+shelf+liners&qid=1561341434&s=gateway&sprefix=no+slip+shelf+%2Caps%2C198&sr=8-3
  • Corelle dishes – These are almost unbreakable.  When they do break, they explode!  We’ve had the same set for 15 years of RVing and have only lost two plates when we set up a cupboard poorly and the cupboard door popped open while we were on the road.  Luckily, it was a set of 8 place-settings, and we could never fit that many people in our rig anyway!  These dishes also stack very compactly.  They’re a great choice for RVing.  I like to add little free-standng shelves in my cupboards.  When I set the dishes up poorly that one time, I set the plates on the top shelf.  They’re too slippery for that!  Bowls that next are a better idea.  They don’t slide around.
My Corelle dishes minus two plates. Don’t put the plates on the top shelf! They turn into projectiles! Notice the no-slip liner under everything.
  • When it comes to the kitchen, think space-saving – Think things like nesting mixing bowls and measuring cups.  You can also find things like a collapsible colander to save space.  Try not to buy things that only serve one purpose unless you really can’t live without it.  For instance, I can’t live without my Pampered Chef avocado tool. So, I have one in my utensil drawer. Very important! 
  • Find ways to avoid jumbled messes – I am in love with these clear plastic bins that you can put in drawers and in cupboards, refrigerators, and pantries. They not only keep things organized, but they keep taller things like bottles of olive oil or wine from toppling over.  They also keep little leaks out of your cupboards.  I have them all over my rig!   They are in the kitchen drawers, in the bedroom drawers, etc.  I love shopping for these at the Container Store because they have every size imaginable. Amazon also has a bunch.  I have also seen them at Home Goods, Bed Bath and Beyond, and a few other places.   Here’s an Amazon link some for the pantry https://www.amazon.com/interDesign-Kitchen-Organizer-Refrigerator-Freezer/dp/B00CS8DT00/ref=sr_1_5?keywords=pantry+binz&qid=1561341129&s=gateway&sr=8-5
I love pantry bins! The clear ones are my favorites!
  • Sort your kitchen utensils by size and then, category – If your kitchen utensils are in a drawer, sort them by size.  They stay less jumbled that way.  I sort by size first and then, by category.  Use the little sorting bins mentioned above.   For instance, I have my knives on the long side of the drawer where aren’t any little bins.   Little utensils for working on vegetables like my avocado tool and tomato corer are in the same bin.  If You’ll have a much easier time finding things and spend less time digging through your drawer.  You’re on vacation!  Looking for things isn’t fun!
  • Utensil holders – If you have room on your counter, a utensil holder is great. I have one and put it in the cupboard when we travel so it doesn’t slide.  In our last trailer, I was able to wedge it between the coffee maker and the wood valance thing and it didn’t move.  I love to cook.  Having my most used utensils handy is important to me! 
  • I love a mug drawer!  – We had our first trailer for 10 years and kept our mugs in a drawer lined with no-slip liner.  We never had a single chip.  We got a new rig and put them in the cupboard and got all kinds of chips!  I have designated a mug drawer in our new 5thwheel.  I’m pretty excited about it!
I love my mug drawer!
  • Get good non-stick cookware– You can buy decent non-stick cookware and the prices are all over the map!  Check out places like Home Goods, TJ Max, and even Target for nicer pots and pans. Remember, you won’t have a garbage disposal and probably won’t have a dishwasher.  The last thing you want to do on a vacation is to work hard at  scraping things out of your pots and pans into the trash and then, scrubbing them.  No fun!
  • Measure your oven! – RV ovens are weird and aren’t universal in size.  Each of our trailers have had a different sized oven. I once bought a cookie sheet for the trailer without measuring.  It would have fit had it not had little handles. My husband bent it up to make it fit. This time, I measured!  I have a really nice, new cookie sheet that’s going to actually fit!  If you’re using something like a Dutch Oven, you’ll want to measure the height to make sure it’s going to fit.  (See my blog entitled, “Don’t burn your biscuits – Dealing With Weird RV Ovens” for tips on getting your oven set up to cook better).
  • Under the dinette storage – If you have a booth dinette, you most likely have extra storage.  That’s where I put things that I don’t use as often – like my beat-up pot that I cook clams in.  If you have a drawer in your dinette bench – lucky you!  That’s where we put our dishes in our first trailer.   In all of our trailers, we have also store beach towels in the dinette.  Funny thing, we live in the Pacific Northwest and do most of our trailer trips to places without warm beaches.  When I moved the beach towels into our new rig, we still had Little Mermaid and Power Rangers towels.  My kids are now 23 and 19.  It’s been a while since they were used!
  • If you have a shallow, wide drawer – this is a great place to put things like cookie sheets, cutting boards, a flat cheese grater, etc.  
  • Counter space maximization – Many RVs are short on counter space.  If yours didn’t come with the extra pieces of counter that you put over the sink, I recommend having some cut.  Have two cut – each ½ of your sink’s size.    This way you can have half or all of your sink covered.  This will add some space onto your counter.  Your stove probably has a cover.  We use the cover on the stove for extra counter space when needed for things like pizza boxes (because sometimes, ordering pizza is a life-saver!)
  • Non-slip bookends– I have recently discovered a new use for non-slip bookends. These are very inexpensive and a great way to keep things like boxes of foil and Ziploc bags from sliding around in the cupboard.  I’m also planning to use them to hold up boxed food like cereal.  They come in a package of two for about $4.
Bookends keep things like ziplock bags, foil and saran wrap from flopping over while you travel.

If you’re still shopping for your RV, make sure you don’t get wooed by the rest of it and settle for a kitchen that you have to make work for you.  When we were shopping, I’d check out the kitchen first.  If I didn’t like the kitchen, I didn’t bother to look at the rest of the rig.  The kitchen is that important to me.  My husband went along with this crazy method because he likes it when I like to cook while we’re camping (fake camping). 

I hope you’ve found at least a little take-away that you can use in your trailer or maybe your kitchen at home.  Happy kitchen set up!

Next Trailer Girl Blog Post – Setting up your Bedroom and Bathroom 

Setting Up Your Trailer – Making It Yours While Maximizing Comfort and Space

Decor

You buy an RV because you want to be comfortable when you camp, or as we like to call it, fake-camp. You’ve probably spent your fair share of time in a tent sleeping in a sleeping bag.  That’s all fun, but you’re ready to be comfortable!   You’re also on vacation.  You don’t want to spend a bunch of time after you arrived setting up and straightening up.  

We recently purchased a new fifth wheel.  I have been having a lot of fun getting to make it ours and organizing cupboards and drawers.  This is now the third rig I’ve set up and personalized.  I have gotten way too many ideas of what to put into this blog post. So, I’ve decided to break it down into 4 posts: Décor, Kitchen, Bedroom and Bath, and Favorite Things for Storage.

Let’s start with décor since many of you may already have everything set up efficiently enough for you. We purchased our first trailer in 2004. RVing was nowhere near as popular as it is now, and décor was stuck in the early ‘90s.  Trailers came in dusty blue or mauve.  Bleh!  Our sofa had mauve and burgundy flowers with green leaves.  I hated it, but there was no good reason to pay big bucks to re-cover it. So, I had to work with it.  I did everything I could to pull out the burgundy parts of the flowers and the green on the leaves.  I used green and burgundy throw pillows and then, tried really hard not to look at the pink flowers for the 10 years we traveled in that trailer. Thankfully, the RV industry has gone more neutral in their design and it’s much easier to add décor touches that are actually yours – not the mauve version of you!

 I’ve recently joined the Facebook group for our trailer manufacturer and have seen some over the top re-decorating including re-wallpapering, re-upholstery, painting, etc.  I like to save that effort for my house and work with what I’ve been given in the trailer (since I had so much practice with the mauve and number).  Keeping it simple will also save you money so you have more to spend on actually going places.

There are a few things to keep in mind when you’re decorating:

  • You’re preparing for an earthquake – OK so not a real earthquake, but when you hit the road, whatever you’re towing has an earthquake every time you hit the road. Don’t put anything in your RV that you are worried about getting broken.  
  • Décor can add a chore to your set up if you let it – I try to avoid too much nick-knack type items that have to be taken out to set up when we arrive and put away when we get ready to go.  I’m on vacation already!  I don’t want extra chores!  I save this chore for very special items, like a favorite photo of my kids.
  • You should love it – This is your vacation home!  Only decorate with things you love.  I love being in my trailer!  It’s been a thing for all three of them!  I love looking around at my “vacation home” and enjoying my surroundings. Of course, it helped to be sitting on the ugly mauve sofa so I couldn’t see it when we were in our first rig.  If you can’t sit with your morning coffee and enjoy your surroundings, fix it!  Find something you love and put it in your RV! For the record, in the featured photo of our sofa. My husband loves the “dead animal” pillow and I love the Pottery Barn pillow. I love the “dead animal pillow’s” colors and how it represents so much of our travels around the Western US. They’re sort of pulled together by the red leather pillows. We decided we didn’t care if it wouldn’t be approved by Martha Stewart. We love it – even if it might be breaking some interior design rules!

The biggest bang for your buck in décor are things like throw pillows, rugs, towels in a color you like, or a throw blanket on your bed or over the back of your couch.  All of these things can be easily changed out if you get tired of them too. My mom was a super decorator.  She would put new curtains in everything she touched, including my first trailer!   It was a good thing!  The first set of curtains faded quickly.  She made some really nice ones with linings.  Now, I’m seeing less curtains and more shades in trailers.  There are often curtain type valances that are easily replaced with a little sewing know how.  Don’t let curtains or fabric valances be deal-breakers when choosing your trailer.

In our new rig, we used mostly things we loved from the décor we put in our old trailer such as throw pillows, the quilt on the bed, pictures from the walls, etc.  We are National Parks geeks and we’ve been collecting greeting card versions of the posters.  I frame them and we hang them on the walls.  It’s a cheap way to decorate!  It’s also fun to decorate with souvenirs from our travels.

Hanging things on the walls is a bit of a conundrum.  Trailer walls aren’t like the walls at home.  For wood frames, we drill all the way through the frame and screw it onto the wall with 4 attractive screws.  We’ve never had a problem with a picture coming off the wall.  The rub is, when you go to sell your rig, you either have to leave the pictures or holes in the wall.  What we did was, took the frames down, pulled the pictures out, and screwed the frames back up.  So, the new owners of our trailer will have frames to fill with their favorite pictures.

4 attractive screws are holding up my picture. This is a framed greeting card version of a National Parks poster that I framed myself.

For our new trailer, I bought a metal sign that I absolutely love.  It didn’t have a good way to hang it from a screw without compromising the design.  I used command picture hanging tape and it’s working great.  I’d be leery of using it with picture frames with glass.  Trailers get exposed to such big temperature extremes. I just don’t trust the tape for something breakable.  I’ve heard from others that they’ve had no problems.  

I thought the screw might compromised the great design. So, I hung it up with Command Picture Hanging Tape. Ghostly looking person in the window is me!

Kids and general activity can cause a disturbance in the décor.  There are wallets, cell phones, cell phone chargers, sunglasses, brochures for things to do, the pamphlet that the RV park gives you with all the rules, the paper with the code to the “big potty,” etc.  All of that can clutter things up and drive you nuts (or not – I am a bit of an OCD neat-freak so these things drive me nuts).  Here’s how we keep it under control.

  • Baskets are a big help– Our first trailer had open shelving.  I didn’t want to see everything on the shelves.  So, we put things in baskets.  It looked great and our stuff stayed put.   We also have a little basket for the keys and wallet so we can always find them.  In our new trailer, I found a spot for a flat-ish basket.  Our plan is to keep all of our brochures and RV park papers in it. 
  • Magazine Rack – A magazine rack that can be attached to a wall is a great way to corral all of the miscellaneous paperwork, magazines, maps, and such that come with your travel.  Just remember to clean it out every so often.  When we were moving out of our trailer, I found things that were 5 years old. We probably didn’t need to save them.
  • Cute recycle basket – We had an issue where we had empty water bottles floating all over the trailer.  We would also pile recycling into the corner of the counter and it looked awful and was also in the way.  So, I bought a cute, small, narrow basket that fits by the door of the trailer.  It fills up at least once a day, and we empty it (or when we had a kid along, we’d send him to the recycling.  We kind of miss his recycling services.)  It really helps to keep the recycling clutter down.
  • Trash can with a lid – One of the best splurge-ish things we ever bought for the trailer was a butterfly lid Simple Human trash can.  We mostly bought it because at the time, we had a dog that liked to get into the trash and it was Daisy-proof!  The beautiful thing about this trash can is, you can’t see the trash, it’s nice looking (as trash cans go), and it’s easily accessible for us to use. We also spend the extra money on the Simple Human trash bags because you also can’t see them!  We really love our trash can! Weird, but true!

If you’re refurbishing a vintage trailer, or fixing up an older used trailer, you’ve got a much bigger project and might need to do things like sew new curtains, re-upholster, re-wallpaper, etc.  That could be a fun project!   I love this show called “Flipping RV’s.”  Check it out!  They refurbish old, sad trailers and do some great décor.    You might find some inspiration.  Even if you’re not into vintage trailers, it’s a fun show to watch.

If you’re still shopping for your trailer, when you step inside a rig you like, sit somewhere in it.  Imagine yourself with your morning cup of coffee and decide it it’s worthy of becoming your vacation home.  Think of what you might be putting into it that you love.  Will it get along with the décor the rig comes with?  Remember, it’s your vacation home!  You don’t want to feel like you’re renting someone else’s vacation home.

Whatever you’re doing, I hope you love it and that it makes your trailer into your vacation home! Happy setting up!

Next Trailer Girl Blog Post:  Setting up your RV Kitchen – Maximizing Space and Efficiency

40 Acres – why you need it when you’re RVing

When we’re on the road and need a place to park, we say we need 40 Acres.  This is based on the old trucker song by the Willis Brothers called “Give me 40 Acres.”  (Link to the song can be found at the bottom of this blog post). I can’t remember exactly how we stumbled on this song, but I’m pretty sure my dad had something to do with it.  The gist of the song is, the trucker needs 40 acres to turn his rig around.  While, you may not really need 40 acres to turn your RV or trailer around or to park it, but you need a lot of room!   One of the more stressful things about RVing is parking it in places not designed for RV’s.  Here are a couple of anecdotes to get you thinking and some tips for finding your 40 acres.

One of the best inventions since we started RVing 15 years ago has been phone apps like Google Maps. My husband will say he wants to stop in the next town for lunch.  He’ll, then, ask me to find a place to eat with 40 acres of parking.   I get extra points if I find an In N Out Burger.  So, I proceed to look for places to stop in the next town (or wherever we think we’re going to be).  Then, I’ll click on the restaurant on the map and zoom in so that I can see what’s around it to see if there will be a good place to park. We usually can’t park at the restaurant and have to do some walking, but that’s a welcome thing on a long road trip. We usually try to find someplace like a closed bank or the hinterlands of a mall parking lot and take up about 5 parking places.  Sometimes, we can parallel park against a fence or something like that. 

One time, in Provo, Utah, we found an In N Out Burger and parked in the hinterlands of a nearby strip mall.  Then while we were eating our burgers, we thought, “Wouldn’t it be great if we could find a piece of chocolate and a Starbucks for the road?”   He got on his phone and found a See’s and a Starbucks a couple blocks up!   We got in a nice walk and got a burger, chocolate, and coffee fix all in one stop! It was a great stop!  Again.  Google Maps for the win!  It’s a huge help if you want to park or if you just want to find a piece of chocolate.

Another time, he mentioned we were getting low on gas.  I was super sleepy as we had hit the road fairly early in the morning.  I needed a leg stretch and caffeine.  I suggested that it would be great if we could find a stop with a rest stop, gas station, and Starbucks all close together and then, promptly fell asleep.  Next thing I know, he’s poking my arm while exiting the highway saying, “Look what I found!”  It was a stop with a rest stop, gas station, and Starbucks all in one place!   It was a miracle!!!

Here are some other things we’ve learned along the way:

Rest stops are almost always a sure thing– We have yet to find a rest stop without RV parking.  When the kids were little, we would stop at rest stops and make breakfast or lunch on the road.  It saved money and a bunch of stress.

Walmarts often have 40 acres– As much as I hate Walmart shopping normally, it can be a huge help on the road.   Usually, we can find enough room to park.  Many Walmarts have grocery sections, 1 ply toilet paper, RV supplies, and other things you might need on the road.  Some Walmarts will let you camp overnight in their parking lots.  I don’t know the ins and outs of that but know it’s a thing.  

Truck Stops are fabulous!We love a Flying J!  You get a little discount on your gas if you’re a Good Sam member, there are usually really clean restrooms, and usually, a wide variety of snacks to choose from.  We didn’t discover these until my son was a teenager.  At our first Flying J stop, we took forever because he was so busy looking around.

Not all gas stations are RV Friendly– we have driven past many a gas station because they look too tight for getting the rig through.  Get used to the size of your rig and the amount of space you need to maneuver.

Always know how you’re going to get out of where you’ve stopped– Be sure to think ahead and find a way out of your spot.  Try to scope it out before stopping.  If it doesn’t look good, drive on.  27-point turns are no fun!

Knowing your route is a big help –if you’re going someplace you’ve been before, you can plan ahead. If you’re going to be repeating your route, keep notes about good stops and stops you’ll never use again.  For instance, we will never stop in Grants Pass, Oregon ever again!  We had a horrible time getting around on their streets, finding parking, and another time, had a disgusting experience at a fast food joint there.  Forget it!  Two Strikes and Grant’s Pass is out!   We have deemed it inhospitable to RVs!

Read the blue signs– Many roads have blue signs that advertise food and gas stops.  Some say 
“RV Parking.”   Sometimes at highway junctions, there are places that are almost like food and gas “courts” that are easier for parking.  There is one such place at Tejon Pass in California. 

Keep “ditch food” handy– Sometimes your best efforts are just going to not work.  You might end up in an inhospitable Grant’s Pass type experience.  You may need to break into your ditch food so you’re not overly hungry and crabby.  “Ditch Food” is what we call the snacks you keep handy in case of an emergency (like ending up in a ditch).  This was funny growing up in Southern California where it was pretty hard to get stuck in a ditch.  Now that we’ve moved to Washington, the term isn’t as funny because there are so many ditches to get stuck in!  Nevertheless, we still call our emergency snacks “ditch food.”  Ditch food has saved our bacon on more than one occasion.

When the garbage man says “don’t go on that loop,” don’t! – You might remember from the blog about how we learned that the awning was the most expensive part on the trailer from getting it stuck in a tree. That was because we didn’t heed the warning from the garbage man. Taking the advice from people in the know is a good idea.

Teamwork is a big help – When my son was a teenager and taking trips with us, it was his job to find the lunch spots and the 40 acres. He also was in charge of navigation with his iPhone. He did a great job and it gave him something to do in the car. Now, I find things on my phone and plug them into the navigation on the truck as I have been fired from navigating (see previous blog post about the last nerve).

I hope you’ve been entertained and helped a little bit.  Here’s the link to our fun little trucker song.  It was one of the first songs we put on our Road Trip Playlist!  https://www.youtube.com/watch?v=qDxVJ471hyg

Next Trailer Girl Blog Post:  Setting up your trailer – making it yours while maximizing comfort and space.